FX StrokeSetter
-
Compatibility After Effects Please check exact version compatibility under the "COMPATIBILITY" tab below
As a motion designer, chances are that you always end up twirling down your Shape Layers' content groups in order to find and tweak all the Stroke properties like Color, Width, Opacity, Dashes, Taper, Wave...
Indeed, After Effects doesn't even offer any "Stroke panel" like Illustrator, and - especially for projects with a lot of stylized outlined vector artwork - twirling down those Shape layers contents groups again and again can become very time-consuming.
This is why I've created a dedicated, handy, new tool! Let me introduce you...
FX StrokeSetter, the missing stroke panel for After Effects!
FX StrokeSetter consists of a set of icon buttons, grouped in a fluid, responsive UI Panel, arranged in the following order :
![]()
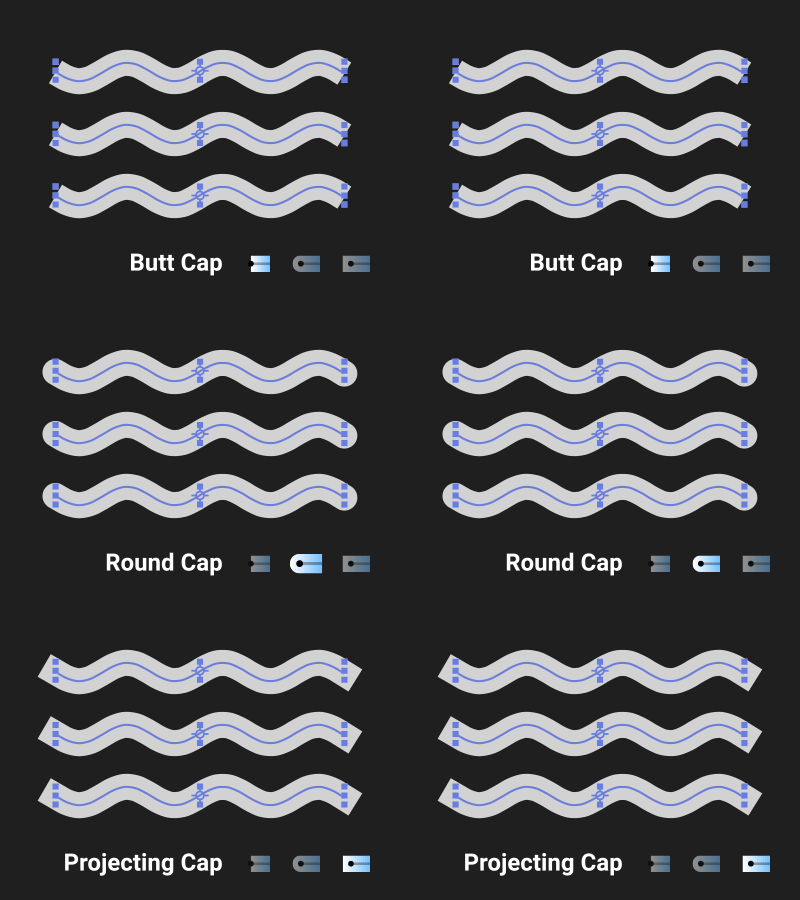
- Stroke Caps
Use the 3 first buttons to set the Stroke(s) Cap to Butt (1), Round (2) or Projecting (3), on selected Shape Layers. - Stroke Corners
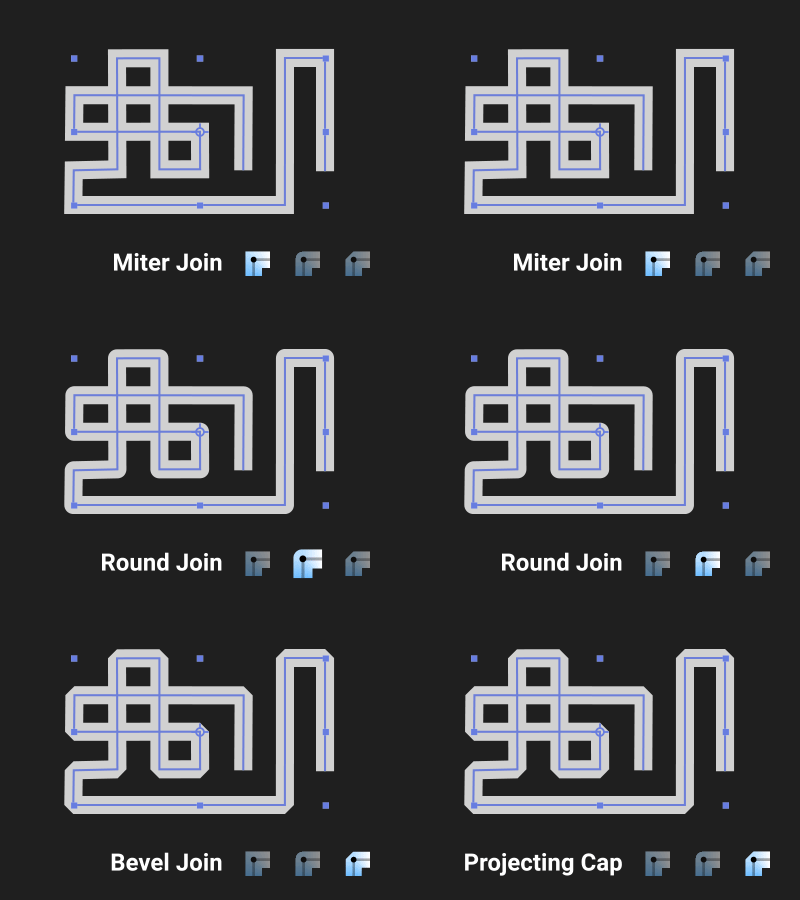
Use the 4th to 6th buttons to set the Stroke(s) Corner to Miter Join (4), Round Join (5) or Bevel Join (6), on selected Shape Layers. - Stroke Align
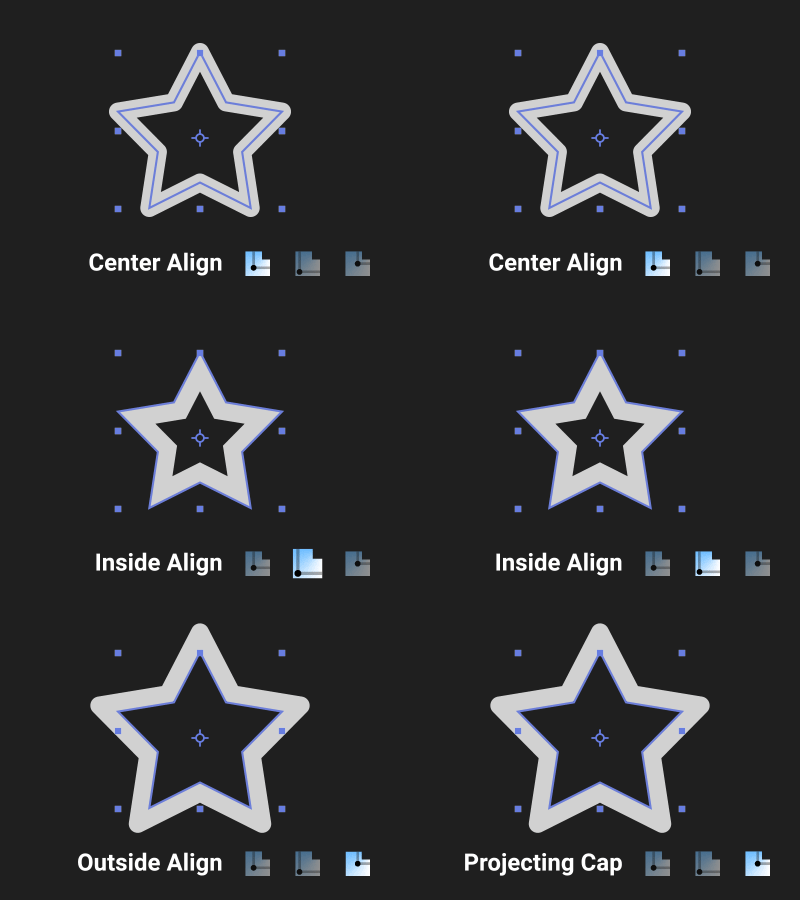
Use the 7th to 8th icons in order to align Stroke(s) on Center (7), Inside (8) or Outside (9), on selected Shape Layers.
This options are better suited for CLOSED shaped (like in Adobe Illustrator) ; you'll generally not want to apply these ones on open paths!
Please also note that an Offset Shape Layer Animator called 'FX StrokeOffset' will be added at the same hierarchy level for each Stroke. - Stroke Taper
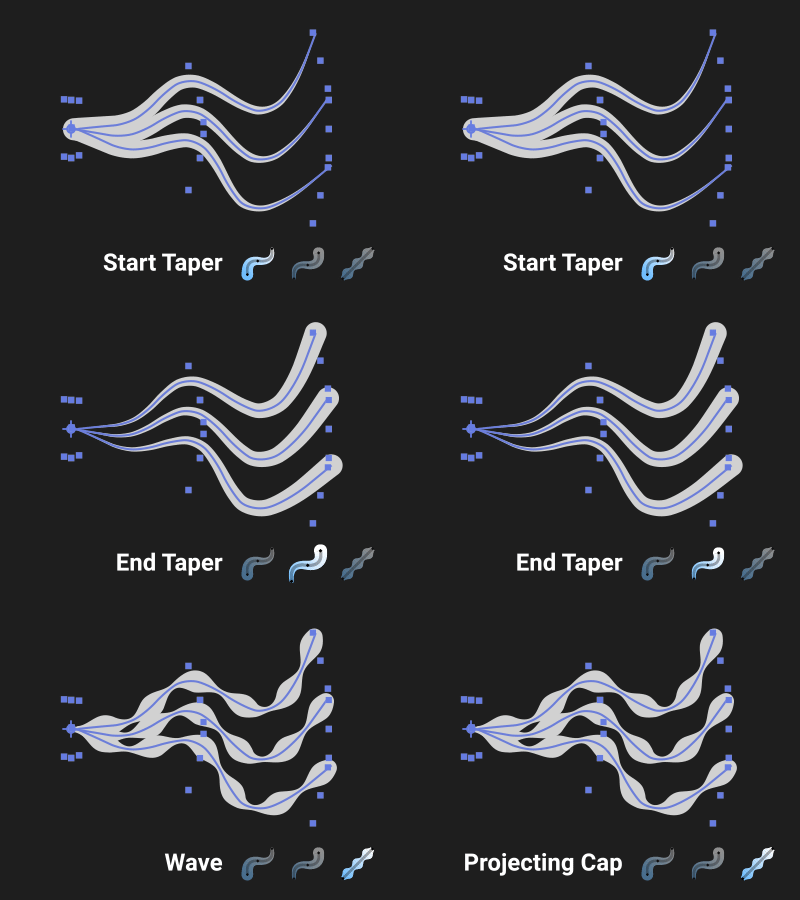
Use one of these 2 buttons to set the value of the Stroke's 'Taper Start' (10) or the 'Taper End' (11) to 100%, on selected Shape Layers.
ALT + click on these buttons will create some local controls. This way, you'll force all the Stroke Taper's options ('Start Length', 'End Lenght', 'Start Width', 'End Width', 'Start Ease' and 'End Ease') to be linked to some same named Expressions Controls that will be added to each Shape Layer's effects stack. This is perfect if you want to maintain some consistency in all the shapes contained in a same shape layer, that should share the exact same Taper Effect.
ALT + SHIFT + click on these buttons will create global controls. Just like explained previously, each Taper property will be driven by some Expression Controls created locally... BUT each of these Expression Controls effects will also be linked through expression to a master Null called 'FX_StrokeSetter CTRL', where you'll find the exact same Controls effects that will drive all the selected Shape Layers globally (conversely to the ALT only shortcut, where controls where just local, independant from each other layer). This is the perfect choice if you want to keep consistency in all the composition or if you plan to expose the effects as Master Properties in the Essential Graphic Panel for templates creation. If a 'FX_StrokeSetter CTRL' Null layer already exists in the active composition, the Controls Effects will be added to it's effects stack, among other existing controls.
- Stroke Wave
Use this button (12) to set the value of the Stroke's 'Wave Amount' to a default value of 75%, on selected Shape Layers.
ALT + click on this button will create some local controls. This way, you'll force all the Stroke Wave's options ('Wave Amount', 'Wave Lenght' and 'Wave Phase') to be linked to some same named Expressions Controls that will be added to each Shape Layer's effects stack. This is perfect if you want to maintain some consistency in all the shapes contained in a same shape layer, that should share the exact same Wave Effect.
ALT + SHIFT + click on this button will create global controls. Just like explained previously, each Wave property will be driven by some Expression Controls created locally... BUT each of these Expression Controls effects will be also linked through expression to a master Null called 'FX_StrokeSetter CTRL', where you'll find the exact same Controls effects that will drive all the selected Shape Layers globally (conversely to the ALT only shortcut, where controls where just local, independant from each other layer). This is the perfect choice if you want to keep consistency in all the composition or if you plan to expose the effects as Master Properties in the Essential Graphic Panel for templates creation. If a 'FX_StrokeSetter CTRL' Null layer already exists in the active composition, the Controls Effects will be added to it's effects stack, among other existing controls.
- Stroke Dashes
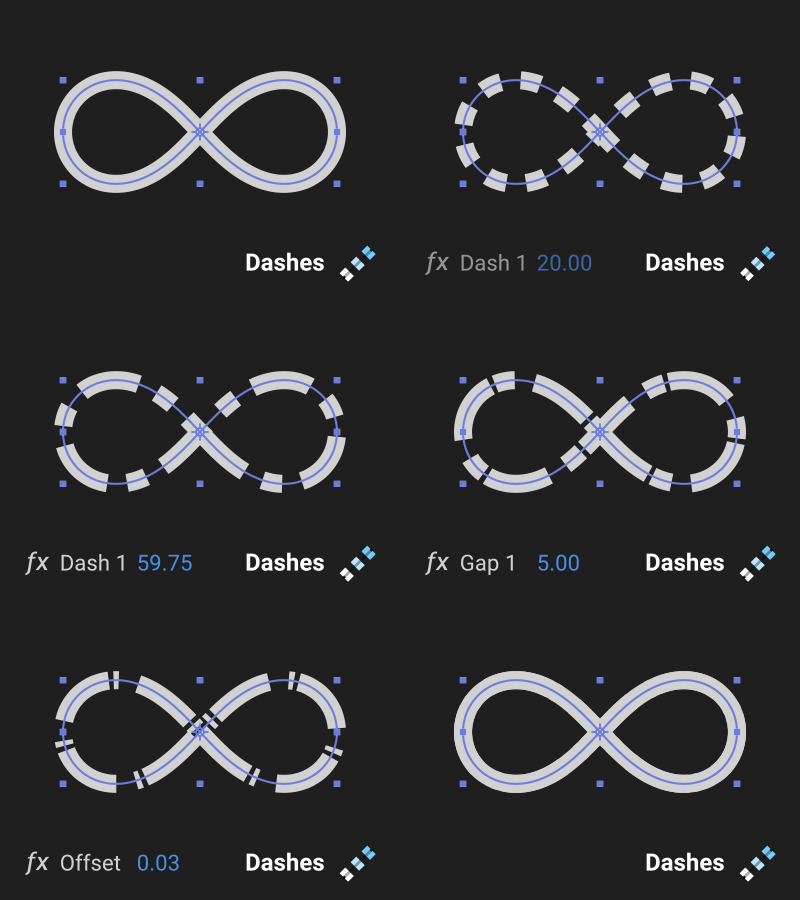
Use this button (13) to add Dashes and Gaps to the Stroke's 'Dashes' group, on selected Shape Layers. A modal window will prompt you to add some dashes and gaps by pair ('Dash 1', 'Gap 1', 'Dash 2', 'Gap 2'...), up to a maximum of 3 Dash/Gap pair (After Effects can't add more natively), thanks to the + and - buttons (then validate with the 'Set Dashes on Selected Shape Layers').
ALT + click on this button will create some local controls. This way, you'll force all the Stroke Dashes's options you had chosen in the modal window ('Dash 1', 'Gap 1', 'Dash 2', ... + another one called 'Dashes Offset') to be linked to some same named Expressions Controls that will be added to each Shape Layer's effects stack. This is perfect if you want to maintain some consistency in all the shapes contained in a same shape layer, that should share the exact same Dashes setup.
ALT + SHIFT + click on this button will create global controls. Just like explained previously, each Dashes property will be driven by some Expression Controls created locally... BUT each of these Expression Controls effects will be also linked through expression to a master Null called 'FX_StrokeSetter CTRL', where you'll find the exact same Controls effects that will drive all the selected Shape Layers globally (conversely to the ALT only shortcut, where controls where just local, independant from each other layer). This is the perfect choice if you want to keep consistency in all the composition or if you plan to expose the effects as Master Properties in the Essential Graphic Panel for templates creation. If a 'FX_StrokeSetter CTRL' Null layer already exists in the active composition, the Controls Effects will be added to it's effects stack, among other existing controls.
- Stroke Reset or Width/Color/Opacity
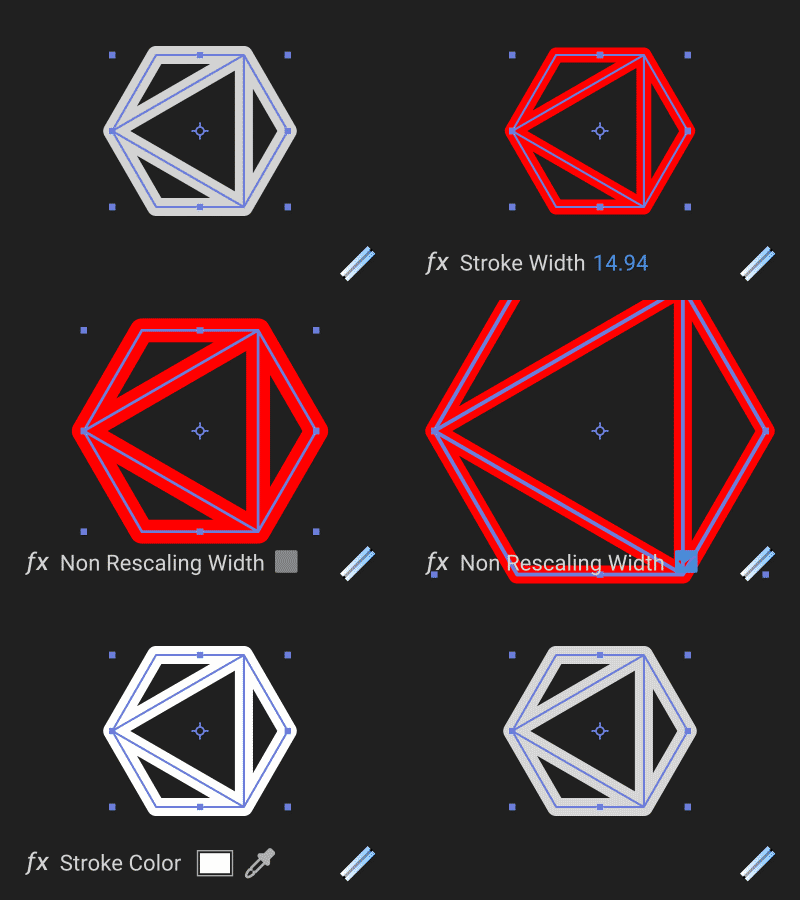
This button (14) can be used for 2 different purpose : either to reset the Stroke's Dashes, Wave and Taper effects, or to apply local or global controls for Strokes' Width, Color and Opacity, on selected Shape Layers.
By clicking the button solely without any shortcut, the script will remove all Dashes from the Strokes, reset their Wave Amount to 0 and rest their Taper Start and End Lenght values to 0.
But if these properties had an expression on them, if you had created local or global controls by ALT clicking the tool's buttons for example, you'll need to 'Hard Reset' the selected Shape Layer's Stroke, by removing all the expressions, effects and the master 'FX_StrokeSetter CTRL' null layer. Just hold down the SHIFT key on your keyboard while clicking this button in order to do so (and confirm it when the warning pops up)
ALT + click on this button will create some local controls for the Stroke Width, Color and Opacity, plus a checkbox called 'Non Rescaling Stroke Width', that you can check if you want your Strokes' width to visually remain the same while you resize the shape layer or its parent! This way, you'll force the Stroke Width, Color and Opacity to be linked to some same named Expressions Controls that will be added to each Shape Layer's effects stack. This is perfect if you want to maintain some consistency in all the shapes contained in a same shape layer, that should share the exact same Stroke Width/Color/Opacity.
ALT + SHIFT + click on this button will create global controls. Just like explained previously, Stroke's Width, Color and Opacity will be driven by some Expression Controls created locally... BUT each of these Expression Controls effects will be also linked through expression to a master Null called 'FX_StrokeSetter CTRL', where you'll find the exact same Controls effects that will drive all the selected Shape Layers globally (conversely to the ALT only shortcut, where controls where just local, independant from each other layer). This is the perfect choice if you want to keep consistency in all the composition or if you plan to expose the effects as Master Properties in the Essential Graphic Panel for templates creation. If a 'FX_StrokeSetter CTRL' Null layer already exists in the active composition, the Controls Effects will be added to it's effects stack, among other existing controls.
- Help & Info or Select all Shapes Layers in the comp
Click on this button (15) without any shortcut in order to retrieve all the product's info, including the version number, some tools description and some external links.
But you can also use this exact same button while holding down the SHIFT key in order to automatically select all the Shape Layers contained in the active composition. Pretty convenient when you have a lot of Shape Layers and complex timeline with different types of layers!
Important Notes :
You can select as many shape layers as you want in the active composition, and the script will cycle through each of them in order to find Strokes and apply the different effects to them, either directly at the Contents' root (if you create an empty shape layer from scratch and add a stroke manually for exemple), or inside Groups at the first level only. Deeper group levels will be ignored in order to maintain responsiveness, but it shouldn't be a problem in general since the 1rst level of hierarchy is the most common case (Strokes are in 1rst level groups if you draw shapes with the AE vector tools or if you import shapes with Overlord for example).
Installation :
Use the aescript and plugins manager or copy and paste both the FX_StrokeSetter.jsxbin file AND the FXStrokeSetterAssets folder into your Adobe After Effects' Scripts > ScriptsUI Panels folder.
The toolset works on PC and MAC, and is compatible with all After Effects CC+ versions EXCEPT for the Taper and Wave effects, that were first introduced since AE CC2020 (build 17.2). In versions prior to this one, the Start Taper, End Taper and Wave buttons will be greyed out and won't be enabled.
Video overview - PART 1 : Cloners and Procedural cloning mode
| After Effects | 2025, 2024, 2023, 2022, 2021, 2020 |
|---|
 Adding to cart...