rd: Render Layers
-
Compatibility After Effects Please check exact version compatibility under the "COMPATIBILITY" tab below
 Adding to cart...
 Renders each of the selected layers separately. You might find it useful if layers represent different versions of an effect or different parts of an effect that you want to render as separate “passes” for flexibility in how they get composited.
Rendering uses existing render settings and output module template, so be sure to create them beforehand. When you run it, you can select the templates to use; select the range of frames for each selected layer to render; control if unselected, adjustment, active camera, and light layers should be rendered as well; and define the name for each rendered output. Each rendered layer will generate separate “render finished” sounds.
The Output Name Template can be defined with the same properties available in the File Name Templates dialog box, with the following additions:
- [layerName] — Current layer’s name
- [layerNumber] — Current layer’s index number
Note: If you select an output template that uses a single-image format (such as Photoshop), be sure to include the [#####] property in the Output Name Template.
Note: If the layer is completely outside of the composition time range, the layer will not be rendered. However, if you select a range of Work Area and the layer is outside of the composition’s work area, the layer will still be rendered.
Note: This version of the script requires After Effects CS5 or later. It can be used as a dockable panel by placing the script in a ScriptUI Panels subfolder of the Scripts folder, and then choosing it from the Window menu.
| After Effects | CC, CS6, CS5.5, CS5 |
|---|
3.1 (Current version) - Aug 28, 2014
3.0 - May 7, 2013
- v2.2 - Fixed the Queue Only option. (20-may-2012)
- v2.1 - Added Queue Only button (for Work Area mode only), per request of James Tobias. (14-apr-2008)
- v2.0 - Requires AE CS3. Can work as a dockable panel or a palette. (12-aug-2007)
- v1.0 - Initial release. Use for AE 7.0. (17-jan-2006)
-

- Compatibility After Effects
MonkeyWipes
Add to CartA wild procedural transition system with virtually endless possibilities. Built for easy experimentation. Great for logos, text or motion graphics.
-

-
- Compatibility After Effects
REACH: AEssential Kit
Add to Cart
Ready to take your motion design workflow to uncharted territories? Reach is an all-encompassing, adaptable, and ever-evolving toolset.
It infuses the After Effects toolkit with a medley of uniquely innovative utilities. From elementary to intricate, Reach takes the expected and elevates it into the realm of the extraordinary. Simplify the complex, streamline the cumbersome, and catalyze your creativity with Reach - the quintessential companion for every After Effects adventurer
Elevate your art. Reach for the stars. -
-

- Compatibility After Effects
Stacker
Add to CartOrganizes layers to the bottom, top, left, or right sides while providing options for layer alignment, fixed starting position, Keyframes, and more. Try it for free and experience the benefits of efficient layer management in your workflow.
-
- Compatibility After Effects
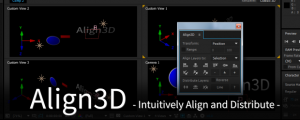
Align3D
"Align3D" is the simple 3D space align and distribute script that can be used intuitively. In addition to "Align", Z-Axis & Other Transform, Range Option.Add to Cart
-

- Compatibility After Effects
rd: Comp Setter
Displays a palette with controls for changing the size, pixel aspect ratio, duration, frame rate, preserve options, motion blur, and renderer of the selected compositions, and all nested compositions (pre-comp layers) in it.Add to Cart#devforacause
This script is part of the rd: scripts collection. Please consider making a donation to a charity important to you. Thanks.$0.00 -

- Compatibility After Effects
rd: Studio Techniques
These are the sample scripts excerpted from Adobe After Effects CC Visual Effects and Compositing Studio Techniques by Mark Christiansen. A complete chapter on scripting by Jeff Almasol is included with the book.Add to Cart$0.00 -

- Compatibility After Effects
rd: Slicer
Displays a palette with controls for slicing the selected layer into a grid. Slicing works best with non-rotated layers. If a parent null layer is created, it will be anchored at the layer's current anchor point.Add to Cart#devforacause
This script is part of the rd: scripts collection. Please consider making a donation to a charity important to you. Thanks.$0.00 -
- Compatibility After Effects
rd: Scooter
Displays a palette with controls for slipping and sliding various layer settings, such as layer footage source, in/out range, markers, and keyframes. You can use different combinations of these settings for more powerful control over layer editing operations.Add to Cart#devforacause
This script is part of the rd: scripts collection. Please consider making a donation to a charity important to you. Thanks.$0.00 -

- Compatibility After Effects
rd: Kinda Sorta
Displays a palette with controls for sorting layers based on specific criteria.Add to Cart#devforacause
This script is part of the rd: scripts collection. Please consider making a donation to a charity important to you. Thanks.$0.00