One Click Export
-
Compatibility Premiere Please check exact version compatibility under the "COMPATIBILITY" tab below
What is it?
One Click Export helps you to export your work. Easy to use and really fast to execute.
Forget the default Adobe way to export. With One Click Export you’ll improve your work saving time.
How it works?
After selected your own preferences, you only have to click on the preset button you want to export. One Click Export saves you a lot of clicks.
A quick view.
Just down below, you can get a quick view video tutorial about how to run and use the extension One Click Export.
At videos tab, you will find detailed video tutorials about how to create your own preset buttons, about deep buttons description and many more.
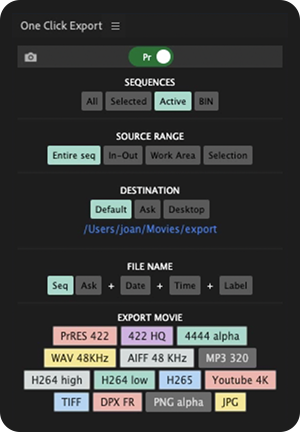

One Click Export quick view.
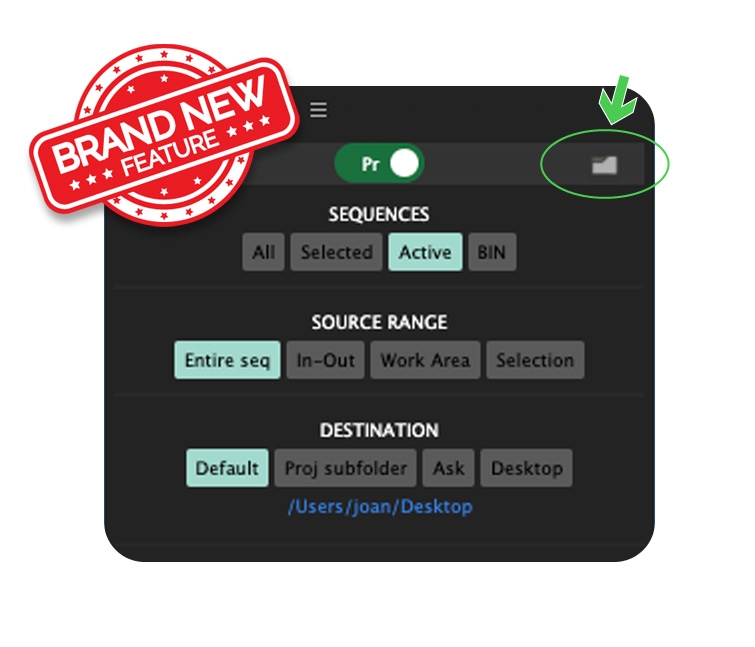
Automatically open folder.
This new feature (version 1.2.4 and above), enables the automatic open output folder* option when a movie render is finished.
How to enable it?
Simply click on the folder icon to enable or disable this feature.
Opening the last output folder:
You can also open the last output folder at any time. Hold ALT (on Windows) or OPTION (on Mac) and click on the folder icon.
*Every time you export a movie or a frame, the output folder path is automatically updated.
Click here to download the Automatically open folder Guide PDF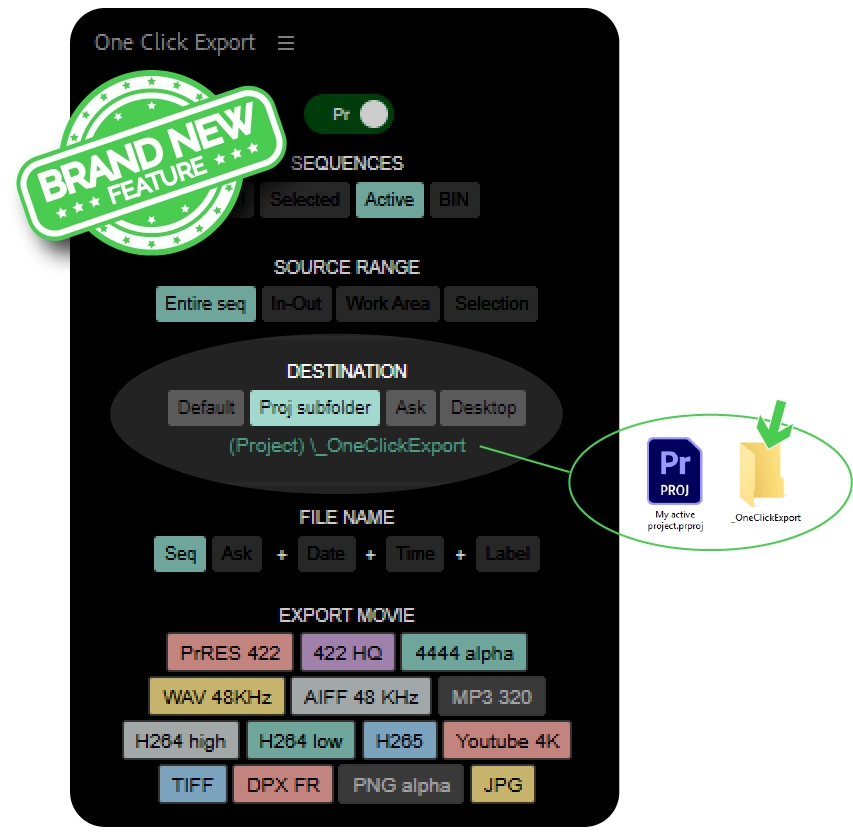
Project subfolder.
This new feature (version 1.2.0 and above), enables the export of media to a subfolder(s) structure within the active project path.
How to set it up?
To define the subfolder(s) structure, simply click on the green-colored link and choose or create subfolder(s) within the current active project.
Opening the destination folder:
Hold ALT (on Windows) or OPTION (on Mac) and click on the button Proj subfolder or the green-colored link.
By default, the export is done into the folder called _OneClickExport located next to the current active project.
Click here to download the Project Subfolder Guide PDFOther features:
- Choose which engine executes the export: Adobe Premiere or Adobe Media Encoder.
- Export as many sequences as you want in just one click:
- All inside the project, the user selected ones, the active one or all the sequences inside _OneClickExport BIN.
- Choose between export entire sequence, in-out, work area bar or user selection clips.
- Choose where to place the export: default user folder selected, inside active project subfolder path, ask before each render starts, or a quick option: the user desktop.
- Choose which name do you want: the sequence's name or ask before export starts.
- Append the date, the time or the button label after the name.
- Up to 28 customizable export buttons.
- Easy way to add your custom .epr files to a button.
- Almost 600 presets to choose: ProRES, DNxHR, H264, HEVC, MXF OP1a…
- 7 single-frame export buttons: JPG, PNG*, DPX, TIF*, BMP, GIF & TGA*. * with alpha channel.
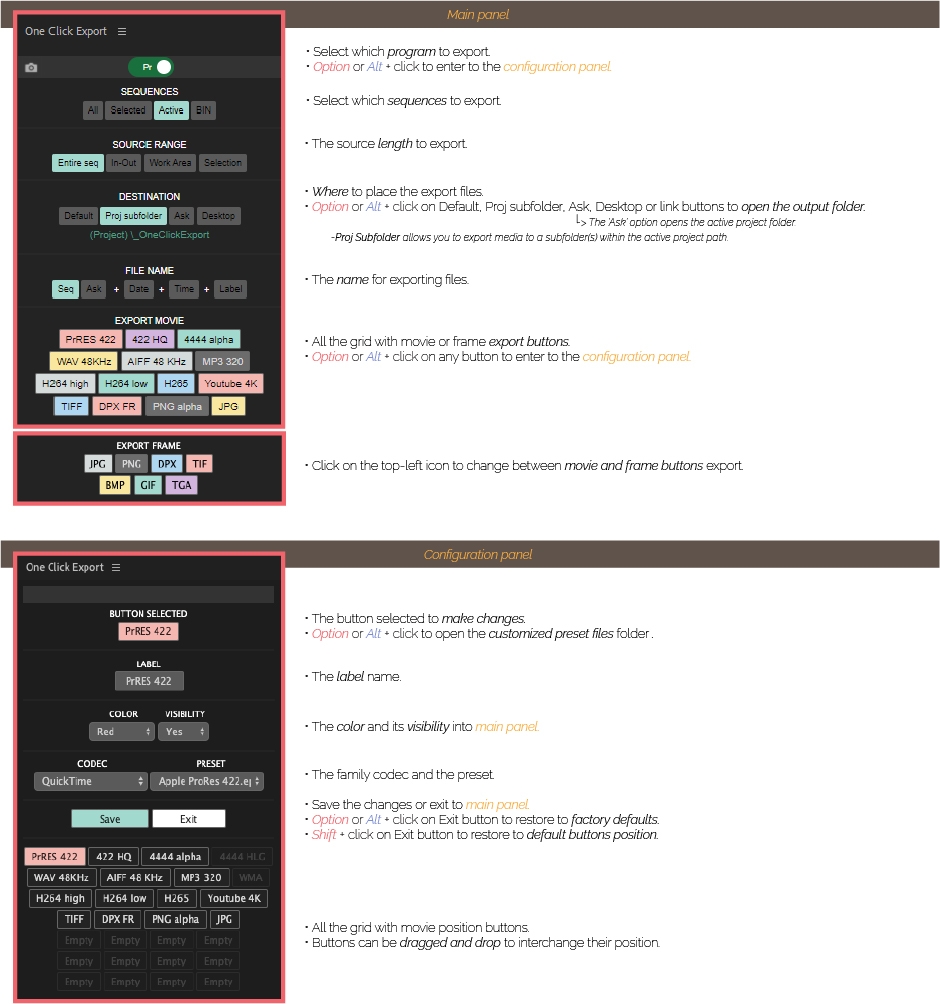
Buttons function reminder:
How to install the trial for free:
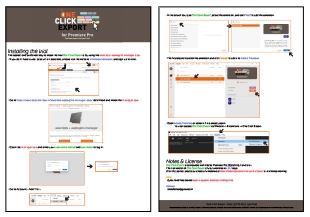
The easiest and preferred way to install and license One Click Export is by using the aescripts+aeplugins manager app and follow the on-screen instructions.
It can also be installed using the aescripts+aeplugins ZXP installer.
After installation is finished, you can access One Click Export via Window -> Extensions -> One Click Export.
Notes:
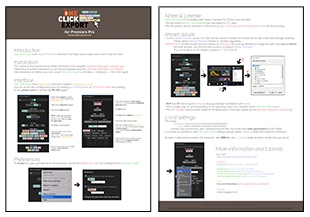
One Click Export is compatible with Adobe Premiere Pro CC2021 (15.1) and later.
*Adobe Media Encoder v15 on Mac has a known issue by Adobe and it does not accept render jobs through scripting.
The trial version of One Click Export is fully functional for 10 days.
License:
This extension is provided "as is," without warranty of any kind, expressed or implied. In no event shall the author be held liable for any damages arising in any way from the use of this extension.
Set any preset button.
A quick tutorial to learn how to set any preset button using default system preset options.
- 1. ALT+click Windows or OPTION+click MAC at the TOP button or at the preset button you want to config.
- 2. Inside configuration menu, select which button do you want to make changes.
- 3. Introduce the label name of the new button.
- 4. Select the color that it will show on the panel.
- 5. Hide or show the button.
- 6. Select the family codec from the list. At the first position, there is the _custom option for custom user presets. Watch the next tutorial just down below.
- 7. Select the preset, do you want to set the button.
- 8. Click Save to finish the setting and update the button.
- 9. You can drag&drop to arrange the position of each button.
- 10. Click onto Exit to return to main panel.
Create and import your own preset.
A deep tutorial about how to create and how to import a custom user .EPR preset file.
- 1. This tutorial begins with old UI, before version 22.3 (April 2022).
- 2. The new UI export workflow starts on 1 min 40 sec.
- 3. Enter to Export -> Media Workflow.
- 4. Select the format codec, the preset & the resolution.
- 5. Make any changes.
- 6. Save the preset.
- 7. Export the .EPR file as…
- 8. The path where it finally has to be saved is:
- Windows: C:\Users\*username*\Documents\OneClickExport\_custom
- Mac: /Users/*username*/Documents/OneClickExport/_custom
- 9. Refresh the CODEC dropdown list. Select _custom at the top position.
- 10. The preset is ready to be used.
Understanding each button.
A deep tutorial to learn what each button does.
- 1. Premiere vs Encoder defines which program will use to export.
- ALT+click Windows or OPTION+click MAC open preset buttons configuration.
- 2. All: export all the sequences inside the current project.
- 3. Selected: export only your selected sequences from project.
- 4. Active: export only the current active sequence.
- 5. BIN: export all the sequences inside _OneClickExport BIN.
- 6. Entire seq: export entire edited sequence.
- 7. In-Out: export from In to Out set points.
- 8. Work Area: export the Work Area Bar length.
- 9. Selection: export from first to last selected clip's length.
- 10. Default: export to default folder.
- ALT+click Windows or OPTION+click MAC open default folder.
- 11. Ask: ask which folder do you want to export before render starts.
- 12. Desktop: export to user desktop folder.
- ALT+click Windows or OPTION+click MAC open desktop folder.
- 13. Path: select the default output folder.
- 14. Seq: use the sequence name as the file name.
- 15. Ask: ask the file name before each export starts.
- 16. Date: append the date after the name. _yyyy-mm-dd
- 17. Time: append the time. _hh-mm-ss
- 18. Label: append the button label pressed.
- 19. Grid buttons: each button pressed starts the export with the appropriate preset settings.
- Open each button configuration.
- Up to 28 buttons-grid are available.
- Each button can be personalized with default system presets or with your own custom preset.
- 20. Frame button: change movie-frame view grid.
- There are 7 single frame export buttons: JPG, PNG*, DPX, TIF*, BMP, GIF & TGA*. * with alpha channel.
- It always exports the current playhead frame.
Commercial.
Why is the number 4 so special? Watch the ad and discover it now!
| Premiere | 2024, 2023, 2022, 2021 |
|---|
1.2.4 (Current version) - Jun 17, 2024
- Some feedback messages have been fixed.
1.2.3 - Jun 1, 2024
- Fixed the rendering message when there is an export error.
1.2.2 - Mar 12, 2024
1.2.1 - Jul 26, 2023
- Improved path indication for RootDirectory and NetworkPath on Windows.
- Increased the length of the Default export and Project subfolder path by 10 characters.
1.2.0 - Jun 21, 2023
- Updated Google Analytics protocol to GA4.
1.1.1 - Apr 11, 2023
- Fixed the issue where selecting the ALL option would export unwanted internal sequences from Essential Graphics.
- Optimized the extension's file size and loading of certain fonts for improved performance.
1.1.0 - Apr 3, 2023
- Improved user experience by adding more informative messages on the Premiere popup panel.
- Replaced alerts with messages to provide more user-friendly feedback.
- Added the project location folder selected by default in the 'DESTINATION -> Ask' option pop-up dialog.
- Added the project location folder selected by default in the 'DESTINATION -> blue path link' option pop-up dialog.
- Clicking on the 'DESTINATION -> Ask' option while holding down the 'ALT' key will now open the folder where the project is located.
- Fixed the error that caused the extension to appear on the Adobe After Effects panel.
- Improved the Help... page for the user.
- Fixed minor errors.
1.0.1 - Mar 17, 2023
- Allowed characters from all alphabets for the output file name.
- Fixed minor errors.

 Adding to cart...