Lockdown 3 for After Effects
-
Compatibility After Effects Please check exact version compatibility under the "COMPATIBILITY" tab below
-
Compatibility Cinema 4d Please check exact version compatibility under the "COMPATIBILITY" tab below
-
Compatibility Blender Please check exact version compatibility under the "COMPATIBILITY" tab below
Get the free version now through the aescripts manager app!
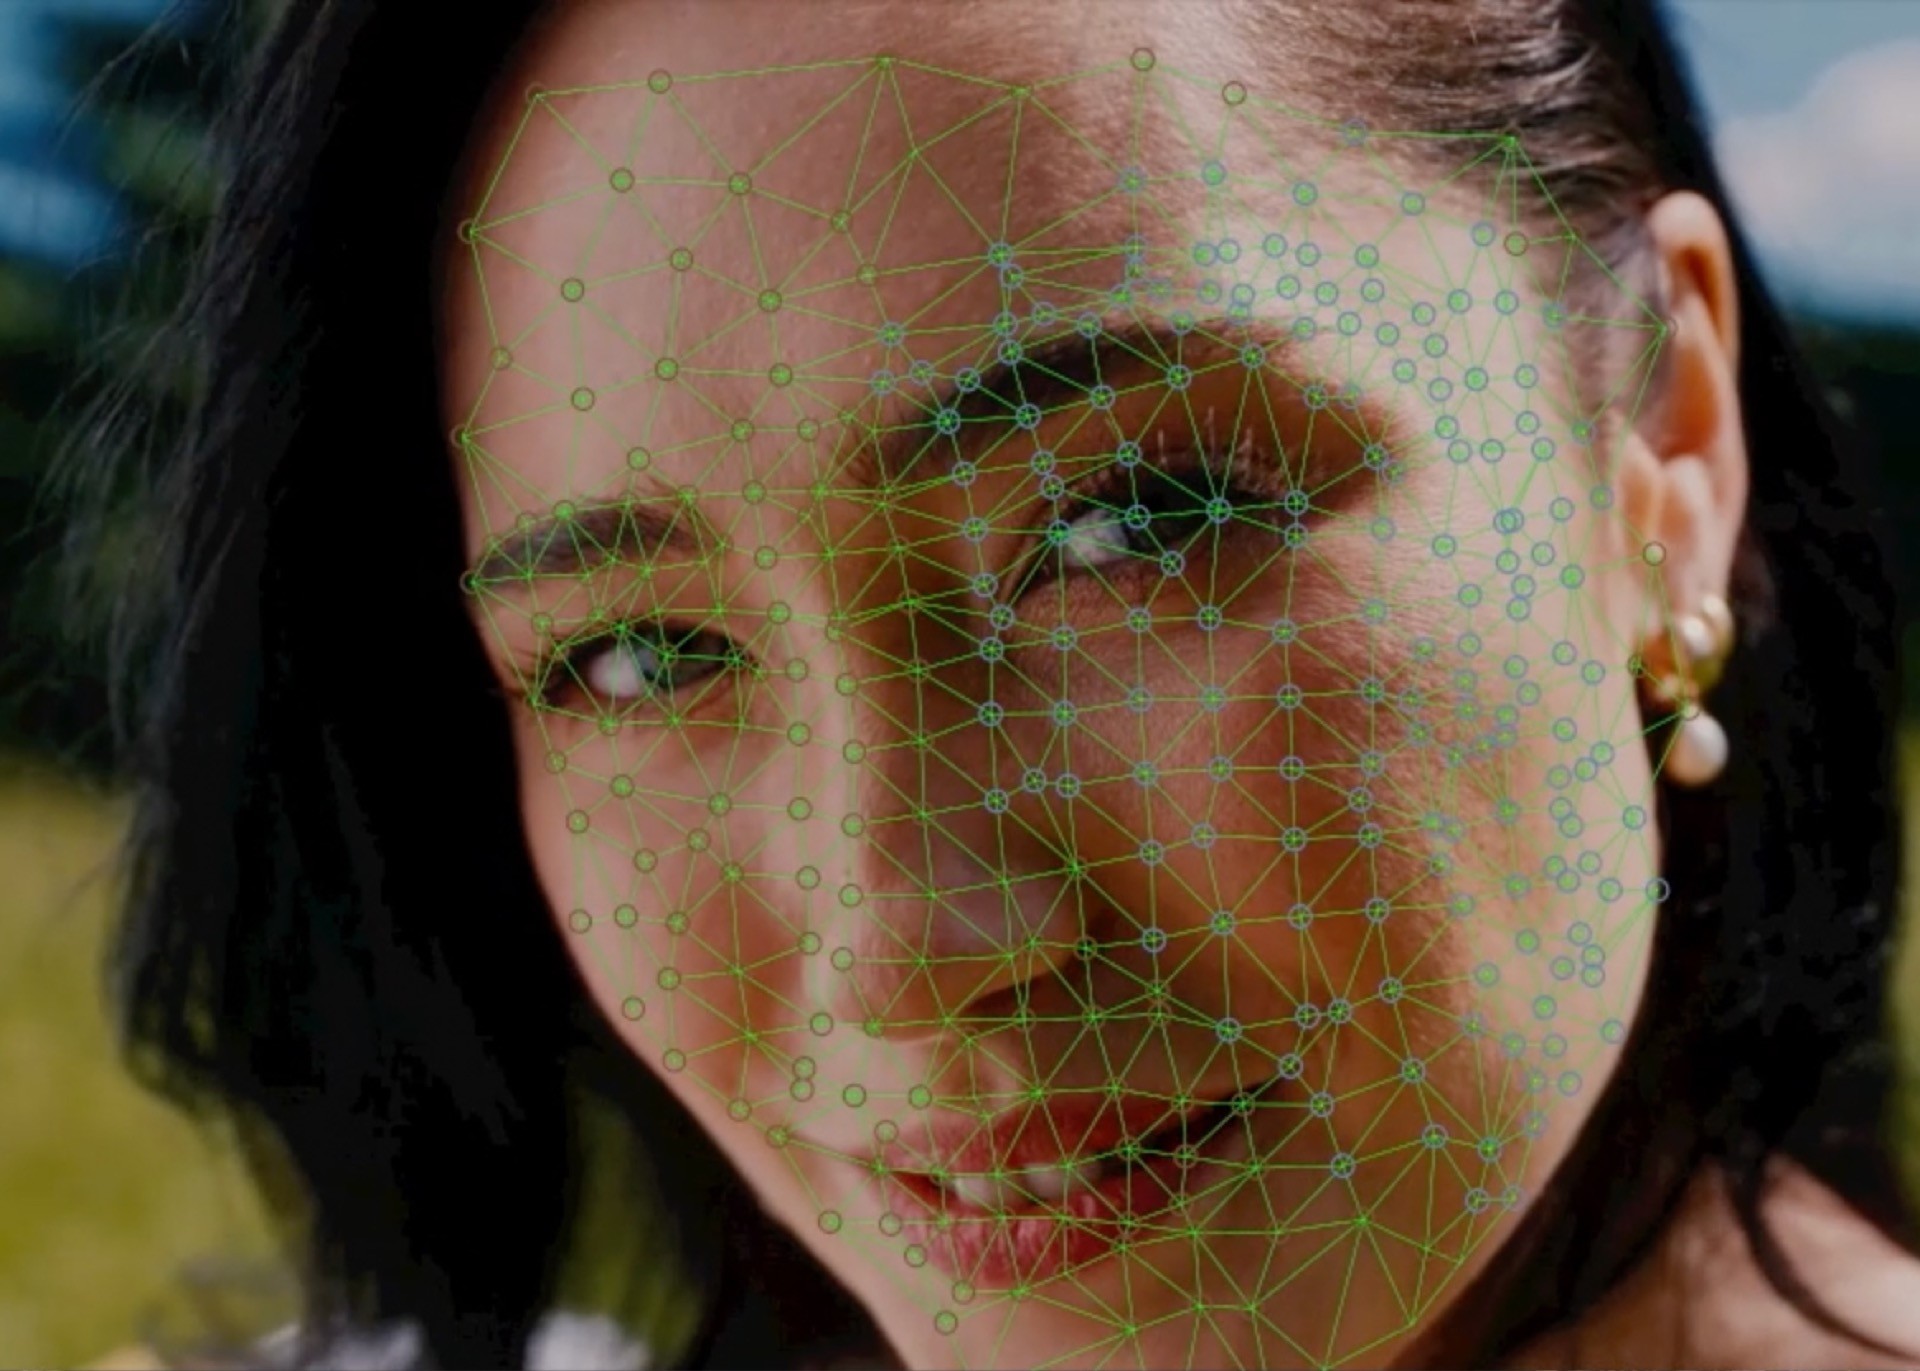
Lockdown (est. 2018) is a revolutionary plug-in that allows you to track warping surfaces inside After Effects
Lockdown is a tool for tracking warping surfaces and planes in After Effects. Lockdown 3 allows you to add 3D depth to your mesh, so you can attach 3D objects in Cinema 4D, and other 3D applications. Try the demo now to see how it works!
Features:
- Track Warping and Planar Surfaces in After Effects
- Cleanup and Paint in a convenient stabilized composition
- Use Photoshop's A.I. Generative Fill on moving footage via Paint Link!
New in Lockdown 3:
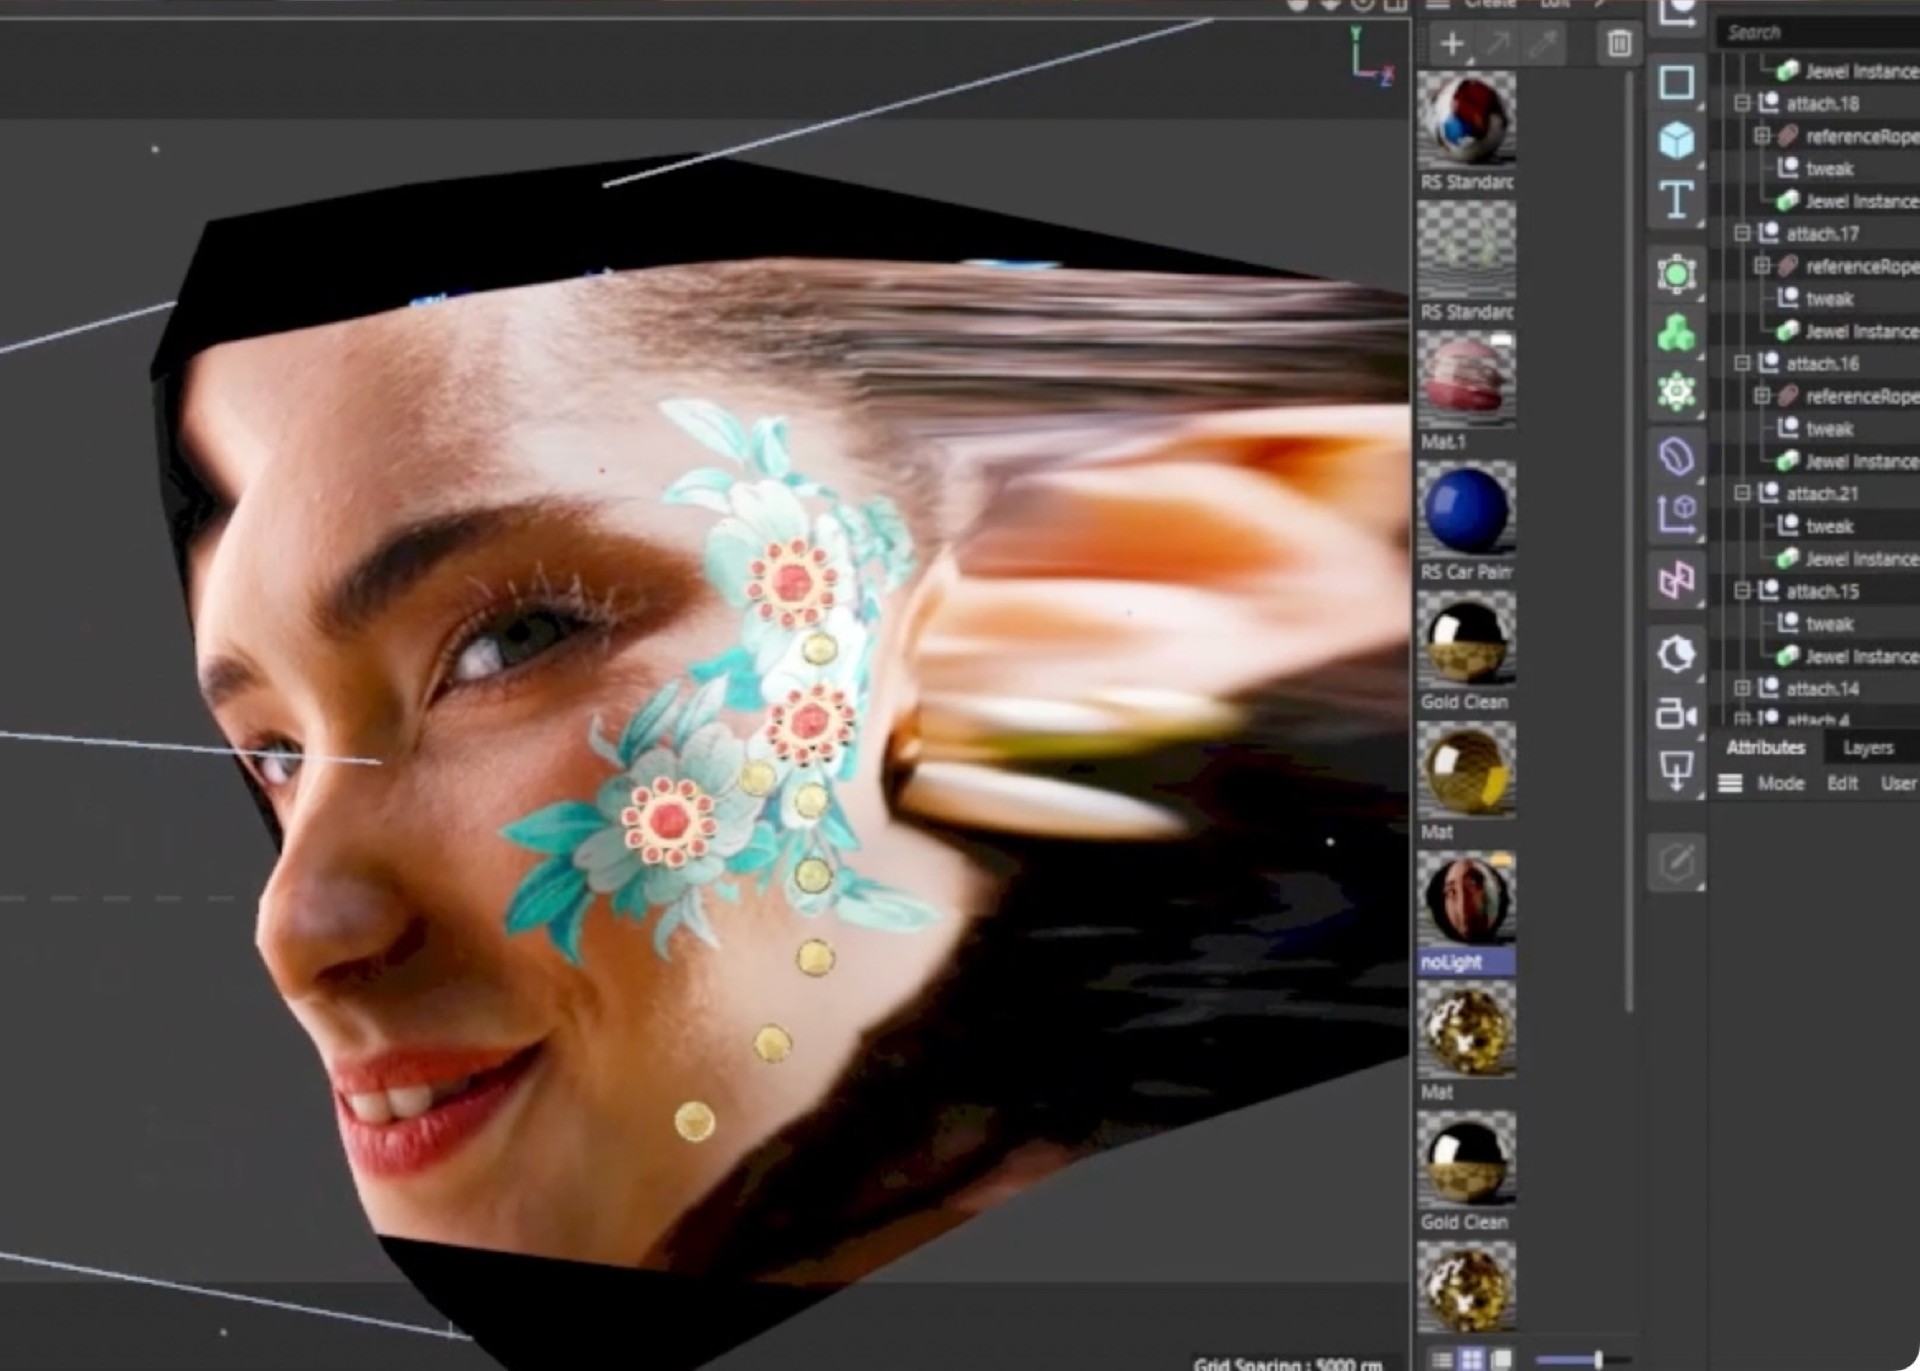
- Export 3D Tracking Data to Cinema 4D as a C4D file, or to other 3D applications such as Blender via Alembic.
- Attach objects in 3D
- Relight your Mesh

Included with Lockdown 3:
To leverage the full power of Lockdown 3, it now comes bundled with these 2 incredibly powerful tools (a $250 value!)
Reactions
I will only say this a few times left in my career...
— Andrew Embury (@aembury) September 30, 2019
This is ✨game-changer✨
How and wow — just wow...#postchat #mochat #mograph https://t.co/qWk7JktE3F
THIS IS INSANE. This is going to be such a powerful plugin. I wish I had a use for it right now https://t.co/LgERYg2luB
— adam zimmer (@AdamZimmer93) September 30, 2019
This is nuts. https://t.co/321AsTGaSw
— Brent Pierce (@Cineblur) September 30, 2019
The frequency with which I say this may be increasing. Nonetheless, THE! GAME! HAS! CHANGED!
— Evan Abrams (@ECAbrams) September 30, 2019
I have had to do this manually for too long, and I love that a computer can do it now.
Lockdown is another class of tool. I strongly feel it could convert entire studios and pipelines from Nuke/Flame to AE
- Teddy Gage - Shotgun Studios
Whattawhaaaat?!!!
— Willem (@grumpnl) September 30, 2019
The game has been changed! I REPEAT! THE GAME HAS BEEN CHANGED! https://t.co/hbwz6npr0f
— IAMJamina™ (@iamjamina) September 30, 2019
Man no more need to do this by hand... thank godddddd https://t.co/XJTmNxdOUB
— Agustin Eguia (@agustineguia) September 30, 2019
FAQ
Upgrade Notice
If you purchased Lockdown after Feb 12, 2023, you can upgrade for $100 (note that Lockdown 3 is $150 more expensive than v2 was due to all the new functionality and inclusion of Paint Link and Composite Brush, a $250 value on its own). If you purchased before, the upgrade is $200. Simply login to the same account and the discount price will be automatically displayed. If you need assistance please open a support ticket.
I have a white screen or other render errors in the popout
We've figured this one out and will patch it soon. Please disable the "anti-aliasing" checkbox while working in the popout. This is related to a GPU driver conflict, and seems to only happen for users who have installed Unity, Unreal, Visual Studio, Ai applications, or anything that modifies your drivers. While you're working in the popout, please disable anti-aliasing, but turn it back on before closing the popout. Anti-Aliasing works differently in the popout and Ae, and should still render just fine with CPU in your composition.
For other render errors, It may be helpful to reset your Windows display and scale settings, as well as Nvidia control panel settings. Keep your GPU drivers, operating system, and After Effects up to date if you can!
How do I use Lockdown with Blender or other 3D applications?
In the 3D tab, when you export, you can export the mesh as an alembic. The alembic exporter will create a scene with a camera, a warping mesh, and a background object. The almbic format is limited, so you'll need to set up some parts of the project yourself. Import this into Blender, and inside the Lockdown group, you can look through the camera that was created for you. You can attach your footage to the background object. If you need the texture on the mesh itself, you can project the texture using the Lockdown camera as your projector. You cannot assign the textures to the Lockdown mesh via UVs, because the UVs are set to remain completely still aligned to the hero frame. To explain it using a real world example, if you track a shot of a brick wall, you can apply a still frame of a painting texture to the mesh, and it will appear to follow the brick wall.
How do I manually install Lockdown 3 (After Effects)?
We don't recommend a manual install, please use the manager app! https://aescripts.com/learn/aescripts-aeplugins-manager-app/
But if you have a specific reason:
Go to aescripts.com/lockdown (Top of this page)
Press the green "Try" button to access the downloads, and download/unzip.
Enter the Windows folder for a Windows install, copy and paste the ..aex plugin file here: C:\Program Files\Adobe\Adobe After Effects 2023\Support Files\Plug-ins
Enter the Mac folder for a Mac install, copy and paste the .plugin file here: Applications/Adobe After Effects 2023/Plug-ins/
Enter the Models folder, and paste depth_estimator_384x384_low_vram.vrl into the same folder as your plugin.
Go to aescripts.com/downloadable/customer/products and find your license code. It takes about 15 minutes to generate after purchasing.
Copy your License Code.
Apply Lockdown to an empty layer.
Press "Register" at the top of the plug-in.
Paste in your license code.
Press "activate"
In After Effects, go to Edit/Purge/All Memory & Disk Cache
Sometimes I crash (out of memory) when tracking high res footage, or very long footage (Ae)
In After Effects, go to "Preferences/Memory & Performance/RAM reserved for other applications". By default, it's set to something like 3 GB. Try to set this number very high. If you have 32 GB of RAM on your computer, maybe try releasing 16 GB. We're digging into an official fix, but at the moment, Ae and Lockdown aren't properly sharing RAM. AE is battling to create a RAM preview with as much RAM as it can get its hands on, and Lockdown needs a good amount for the motion vectors, point data, etc... Sometimes the system runs out. It's our top priority fix this. You should really only be seeing issues in extreme cases where Lockdown may need an unusually high amount of RAM for high res footage.
How do I get rid of the grid watermark?
Please refer to this faq on how to register your license and some troubleshooting tips.
How do I create a log file?
Please watch this video. Log files contain a record you can send to us, that tells us basically everything that happened since you opened Lockdown until you closed it. It makes it much easier for us to find bugs. Please make sure to delete the log folder after sending us the log, because the log file will get very very large over time if you keep the folder. Basically, if the folder exists, the log file is created and written to. If not, the log file is not created or written to. So you don't want the log folder to exist for any longer than it needs to be.
Lockdown turns a clip black, and nothing works
Please make sure you're using the CURRENT version of After Effects. We built Lockdown with the 2019 API, so it's a guarantee 2018 and earlier will not work at all. We keep it up to date with the latest version of Ae.
Some users report they have to update their graphics card drivers to get Lockdown working. More troubling, some Nvidia users claim GeForce experience says it's up to date, but they had to go to the Nvidia website to manually update drivers before Lockdown would work. Our team on Lockdown updates our graphics drivers immediately, so to minimize the chance of rendering errors, please stay up to date with your drivers.
I'd like to see the Lockdown 2 tutorials only
Here is the Youtube playlist for Lockdown 2: https://www.youtube.com/watch?v=uJv_pO_Bsoo&list=PL1arT3aE34g5d-gJlY_dAVcrJyj37FX5L
I have a problem not listed here, can you help me?
We can sure try. All the help tickets for this product regarding technique are answered us, the creators of Lockdown. If you send us footage that poses unique challenges from every other video listed above, we can test it. That being said, we have a policy to ONLY send back screen recordings of your project for guidance, we will never send back any project files, no exceptions. We answer help tickets to assist you, and to improve Lockdown, but the help ticket system is not a way for us to complete your projects. Please make sure you have all the necessary permissions before sending a project file. You can open a help ticket here.
| After Effects | 2024, 2023, 2022 |
|---|---|
| Blender | 3.6, 3.5, 3.4, 3.3, 3.2, 3.1, 3.0 |
| Cinema 4D | 2024, 2023, S26, R25, S24, R23, S22, R21, R20, R19, R18, R17, R16, R15 |
Lockdown
3.0.4 (Current version) - Mar 26, 2024
- A layer system to make it easier to select and hide groups of points
3.0.3 - Feb 19, 2024
- The camera now follows a single selected point to help reduce eye strain.
- Checkbox in settings to set project's working Gamma to 2.2 in Popout (preview, tracker, depth estimator, 3D exporter).
- Added memory logs for Mac.
- (beta) Hardware acceleration using CUDA and Nvidia GPUs for depth estimation and "Rigid Tracker".
- CUDA setup wizard in settings. An installation video will be released on YouTube soon.
### Fixed
- Fixed keyboard input sometimes failing on Mac, for tracking scale and 3D plane size parameters.
- Fixed a bug where the Popout window doesn't respond to some hotkeys on Mac, before the user's first interaction with UI.
- Fixed a possible crash when tracking cache storage is no longer available.
### Changed
- Added a message about trial mode into watermark.
- Maximum zoom level is increased to x16 (1600%).
- Added a black outline for "trackable" keyframes on keyframe panel.
- Added clear tooltip descriptions for tracking buttons and some other UI elements.
- Added separate tracking settings per tab (normal tracking and stabilized tracking).
- Set default settings for normal tracking to "Extremely Accurate" 540p, stabilized tracking to "Accurate 1.6", 1080p, Tracking Scale 24.
3.0.1 - Nov 18, 2023
- Released a new free version of Lockdown which allows 1 and 2 point tracking for all users. (Run Lockdown in Trial mode, which has the new free features)
- Feature to auto-import your C4D file to After Effects upon creating it with Lockdown
- GPU acceleration for 3D features in After Effects UI.
- "Nudge" function to adjust points using keyboard hotkeys WASD.
- The 'J' and 'K' hotkeys now move the time from keyframe to keyframe, to their midpoints, and to the start and end of the shot.
### Fixed
- Fixed 3D exporter (UV data, transformation scale) in a situation where the Hero frame was not between inpoint and outpoint.
- Fixed issues where some Unicode paths could not be read.
- Fixed Perspective Warping issue in After Effects, where the parameter state was not taken into account during rendering.
- Fixed A bug where baking would not always bake the full timeline.
- UI: fixed some parameters value text alignment, so it's less likely buttons will be crowded or over-spread.
### Changed
- The size of the plugin binary file has been significantly reduced. (around 90mb)
- Depth estimator is a very large (1.3gb) sidecar file ("depth_estimator_384x384_low_vram.vrl").
- The trial version of the plugin now allows unrestricted 1 and 2 point tracking for all users.
- Enable tracking file cache by default.
- "Baking" function now fills gaps in a track after baking.
- Removed frame image rendering in 3D workspace in case there is no mesh to render.
- Renamed "Normal" rendering mode to "Mesh" in AE UI.
- Added "Use Hero Frame Depth" checkbox parameter.
- Hide UI controls for Planar Tracker if it is Off.
- Transform controls are now available in the main Tracking tab for the convenience of our free users.
3.0.0 - Jul 11, 2023
- New Depth estimator
- New 3D Planar Tracker
- Added a new 'rigid' tracking algorithm
- Added a depth rendering output mode
- Added a 3D preview rendering mode in the After Effects composition
3.0.0 - Jul 10, 2023
Lockdown Depth Library (1.2GB)
3.0.1 (Current version) - Nov 18, 2023
3.0.1 - Nov 18, 2023
Paint Link
1.0.8 (Current version) - Jan 2, 2024
-Added a VFX mode checkbox.
1.0.7 - Dec 1, 2023
-plugin now detects some incomplete or incorrect installations, and tells the user how to fix it.
-Fixed a few situations where a PSD might not be updated in Ae, for example, the user closing Ae and Photoshop when Paint Link is not selected.
-Fixed a crash related to the plugin server connection
1.0.6 - Aug 14, 2023
1.0.5 - Jul 29, 2023
1.0.4 - Jun 9, 2023
1.0.3 - Jun 8, 2023
1.0.2 - Jun 1, 2023
- To reduce lag on older computers, we've fully prevented Paint Link from processing or updating when After Effects is not selected as the operating system's active window.
1.0.1 - Nov 28, 2022
-Added a check to ensure "Allow Scripts to write files and Access Network" is enabled.
1.0.0 - Aug 22, 2022
Composite Brush
1.6.8 (Current version) - Dec 19, 2023
1.6.7 - Nov 7, 2022
1.6.6 - Aug 21, 2022
1.6.5 - May 1, 2022
1.6.4 - Feb 5, 2022
1.6.2 - Nov 26, 2020
1.6.1 - Sep 27, 2020
1.6.0 - Jul 21, 2020
1.5.2 - Apr 30, 2020
Fixed a possible compatibility error with previous projects.
Added better adaptation to different linear colorspaces.
1.5.1 - Mar 29, 2020
1.5.0 - Mar 19, 2020
- Added optimize & soften button. This button makes Composite Brush run slightly faster by eliminating redundant processing, and also applies the key softness parameter. The goal will be to have this happen automatically without a button press in future versions.
1.4.3 - Dec 11, 2019
1.4.2 - Aug 29, 2019
1.4.1 - Aug 23, 2019
1.4.1 - Aug 22, 2019
1.3.0 - Jan 13, 2019
- Hair (v1.3) selection style.
- Matte Invert checkbox.
- Restore RGB transfer mode.
- Restore RGBA transfer mode.
[Improvements]
- Expanding the range of Matte Choker to be [-1000 .. 1000].
1.2.0 - Nov 27, 2018
Added "Replace Alpha" Transfer mode.
Removed "Alpha Minimax" and replaced with "Matte Choke".
1.1.0 - Nov 12, 2018
Set Precision to 100 by default.
Added decimal level blur control.
 Adding to cart...