TypeMonkey3D FAQ
GENERAL QUESTIONS
Does TM3D need TypeMonkey to work? Yes- it is not a stand alone script. It operates on TypeMonkey builds that have already been created.
Can it work with earlier versions of After Effects or does it need AE2024? Since TM3D uses a combination of Classic 3D and Advanced 3D renderers, it needs AE2024+ to work because that's the first version that offers the Advanced 3D Renderer. However, you don’t need a copy of TypeMonkey or TypeMonkey 3D to use a pre-built comp, you just need the correct version of AE. So, for example, if you use TM3D to create a build for a client or associate, they won't need their own copy of TM3D to open the build, just a current version of AE. You can learn more about the Advanced 3D Renderer here: https://helpx.adobe.com/after-effects/using/advanced-3d-renderer.html
Can the UI be used to adjust the build after its finished? The only sections of the UI that can affect the build after its complete is Evnironment Update and The Post-Build (Image Map) section. All other changes can be done using the effects controllers or done manually. Anything that is listed as a dropdown item (eg Bevel Style) can't be adjusted in the effects controls. They need to be done manually or rebuilt.
I don't see the Source dropdown in the Environment Light. Make sure the "Expand or Collapse the Layer Switches pane" is on (first icon at the bottom left of the timeline).
Is it possible to use this script to animate non-TypeMonkey text in 3D? No, but you can turn off all the animation and camera settings in TypeMonkey and 3D that. The basic process is: 1) In TypeMonkey, select Style> None, and turn off the MonkeyCam. 2) Use MonkeyTools to unshy Control Layers and delete those. 3) Use MonkeyTools to unshy text layers and animate manually. 4) Run TM3D.s. Keep in mind, you won't be able to use image maps with text animations (eg. animated kerning or many of the AE preset text animations that rely on animating individual letters).
TEXTURES
Where are the bump, specular, normal etc map controls? In this version of the Advanced 3D Renderer, those are not available for Text Layers. Mapping for individual faces, bevel or sides are also not available. We’ve created a workaround that allows for image (diffuse) mapping of the face of the text. You can combine multiple image maps by selecting a texture and clicking Add Image several times, each time changing images. From there you can layer them by change blend modes, or use effects (ie Channel Effects) to combine layers or edit multiple layers together just as you would any other layer in After Effects.
Can I change textures on specific words? Yes- by opening up the iMap comp and replacing texture layers, or turning them off altogether you can have more control over the textures placed on the face of the text.
Can I combine multiple builds? Yes- by using the Color & Opacity presets, you can isolate specific parts of the text layer and create builds for each, tho a matte might need created to avoidoverlaps.Experimentation is suggested.
Why did you create such a weird workaround to just put textures on the face of the text? Many of the features we take for granted in After Effects are not currently available in the Advanced 3D Renderer, such as 3D Track mattes. So we reverted back to the Classic 3D Renderer and the original TypeMonkey build to take advantage of that feature, then built a luminance matte to correct overlap issues caused by the bevel and sides.
What if the image does not fill the text? In some cases, such as long words or lines or extended fonts, the image might not fill the text. In this case, use the Extend Texture effects control located on the iMap comp to expand the area of the image. This uses a RepeTile effect to make seamless textures larger than the 1000x1000 px images supplied in the preset folder.
What do the Effects Controls on the iMap Comp do? These control the transformation of the textures. Each are linked back to effects on the individual texture layers in the iMap comp
How can I change one texture if multiple textures are applied? If you have multiple textures applied you’ll have to select the one you want to change - or - if you don’t have anything selected TM3D give you the option of clearing the deck and replacing them all with a new one.
Note: When updating images, all effects and blend modes will revert back to its original factory settings. Changes you made will not be saved, so if you want it saved, you should either turn off the video switch, create a new textures using Add Image and cut and paste the revised settings, or reset them manually.
Tips: If you’re using a blend mode such as Overlay and theres too much variation in the Environment Map, the image might get too dark or light. One approach to fixing this issue would be to first apply a Default_White Image to the face, then use a Difference Mode for the secondary texture. You can then use the Opacity Effect to even things out. Note: This might not work too well for color images.
Keyframe the transform effects controls to create movement in your texture maps.
If you have multiple textures that use the same matte in a build, you can speed up the render by using a single comp as a luminence matte (manually) and deleting the duplicates.
These textures can easily be combined using blend modes or can make great luminance matte sources for some of the video textures, such as Reflections or Light Beam. (use Channel > Set Mattes)
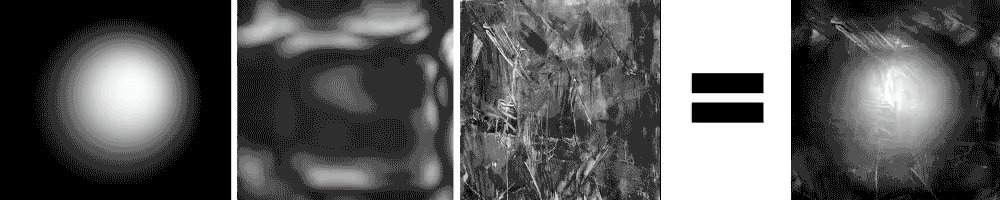
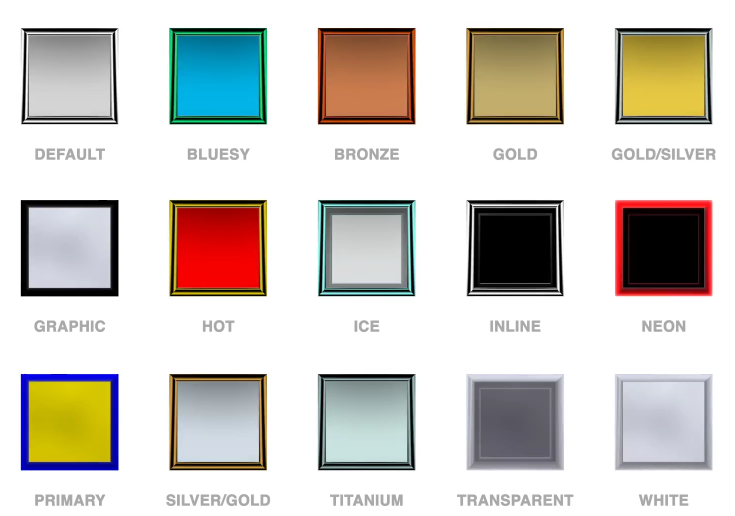
ENVIRONMENT MAPS
These are samples of the environment maps combined with highly specular/metallic materials:
How can I create my own Custom Environment Map? There are many free resources to find HDR images around the web (eg https://polyhaven.com/hdris), but we found that many of these won’t look too good because text layers have lots of flat surfaces that don’t distort reflections…they’ll act more as mirrors. We suggest creating 32 bit abstract images and saving them as Radiance Files in photoshop or After Effects. Make sure to mirror the edges to avoid seams. The HDRs we’ve supplied are 1920x1080, but you can create maps at whatever size you’d like.
What does the Environment Rotation Effect Control do? This controls the global rotation of the the environment, so if you don’t like the part of the environment that’s being reflected in the text, you can adjust it here.
Tip: If you want to show the environment in the background, you can unshy the comp and turn on the video swithc (eyeball) manually. We’ve applied a CC Environment effect to the HDR so it’ll respond to the camera position and the Environment Rotation Speed.
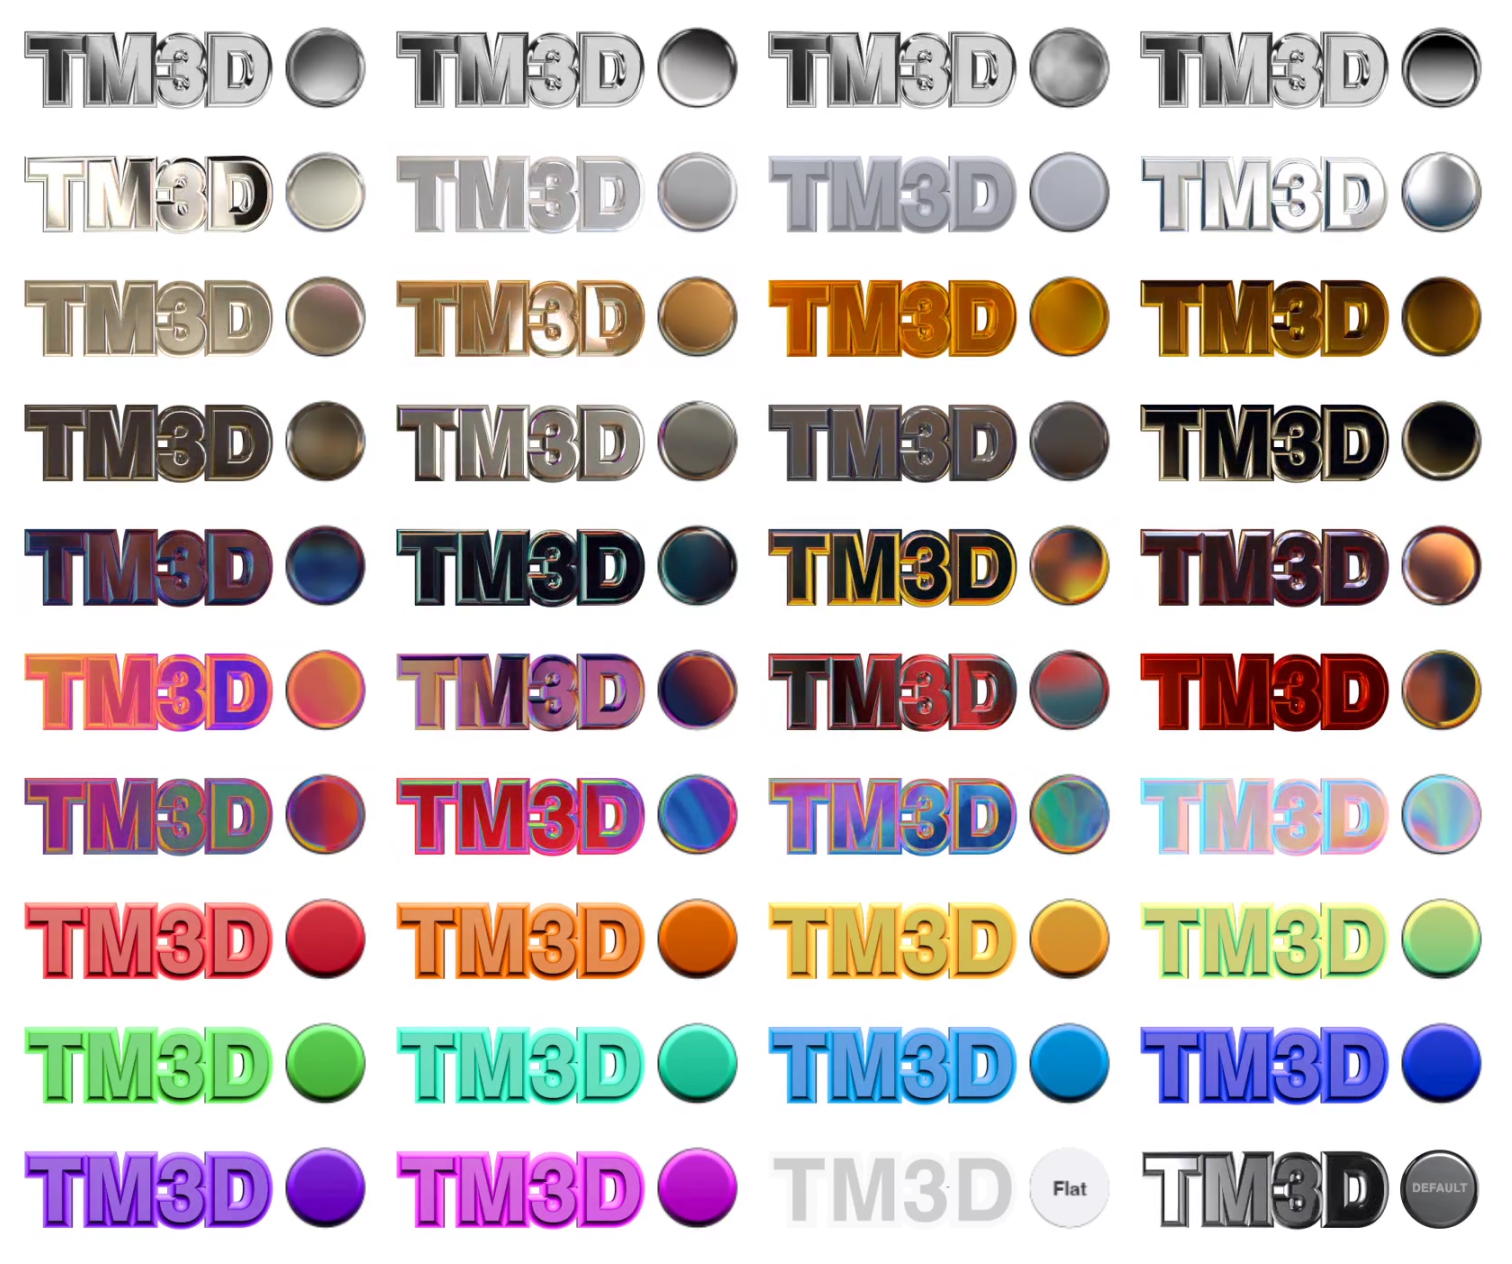
PRESET LOOKS

These represent basic preset Geometry and Material settings, but are heavily reliant on the choice of environment and color settings.
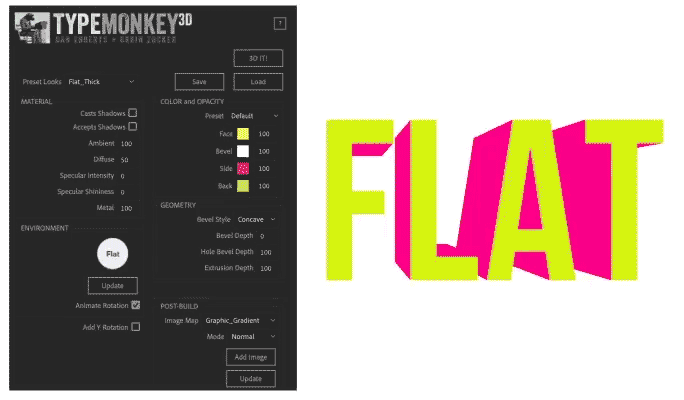
Tip: To achieve a flat graphic style, select a Flat Look preset and use the Flat (white) Environment Map. You might need to adjust the Light Intensity in the effects controls as well.
ADD Y ROTATION
Tip: We found that this works best on builds with fewer words. Longer builds migh create more complex layouts with this active, causing problematic layouts where some words block others. This can be fixed by manually readjusting the Y rotation by selecting specific control layers and changing the rotation in the Properties Window - or by turning this off altogether and manually selectvely changing the X or Y rotation.
SAVE & LOAD
These will save all the current settings on the UI, but will not save Custom images or Environments. You’ll have to locate those again if you reload your UI settings.
DEPTH OF FIELD & MOTION BLUR
While both of these are unfortnuatley not availabe in the current version of the Advanced 3D Renderer, a good substitute is the CC Force Motion Blur effect and strategic use of adjustment layers and a blur effect. Other options include 3rd party Depth Map scripts such as Depth Scanner available on aescripts.
AFTER-IMAGE BUG
While this is not an issue with TypeMonkey3D, we have noticed that often times when a new composition is created after creating a TM3D build, often times you'll see a full screen image of either the texture or the HDR visible when nothing is in the timeline. To remedy this, just move the current time indicator to a different spot in the timeline and it'll fix the issue. Untill you do this, AE will not recogize the new comp.