CircusMonkey Tips & Tricks
*Note for CS6 Users only: A "Missing" warning will appear next to each Psudeo Effect in the effects panel. This will not affect the performance of the script.
How can I adjust the Dolly position and/or Layer Order?
Any of the standard Monkeycams have Target Layers that are shy'd after the build. These layers dictate the position of the camera at each marker. By selecting this layer and going into its effects panel, you will see each layer listed in order they are targeted and a corresponding Dolly position. Both of these can be modified manually. You can change the target order by selecting another layer in the dropdown - or push in or pull out by adjusting the Dolly setting. The Dolly position is also keyframable in case you want to animate it.
How can I create a manual MonkeyCam?

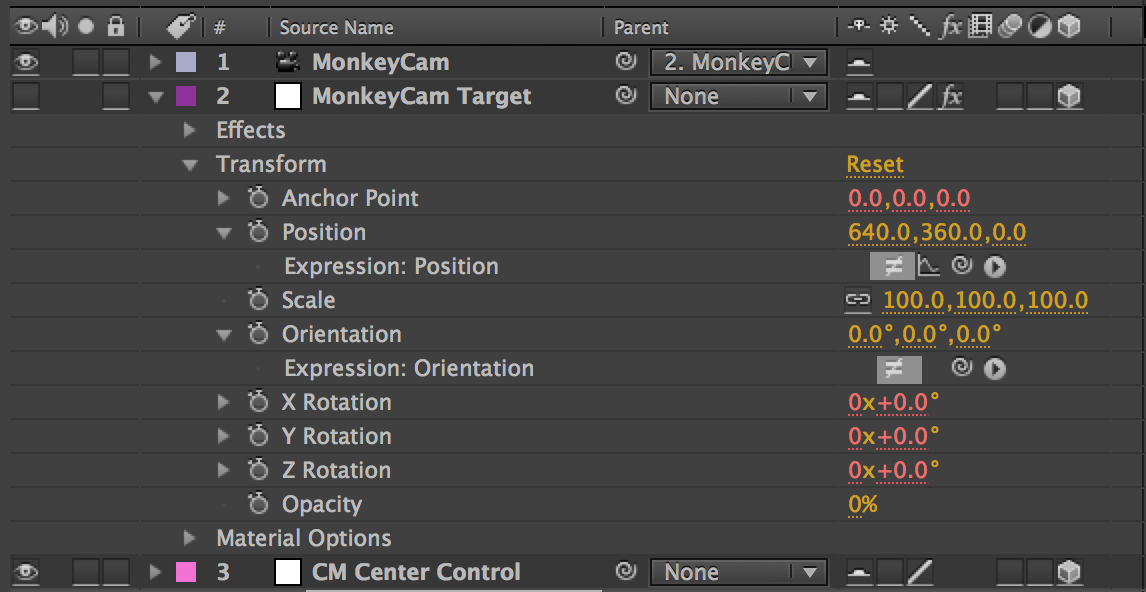
You can create a stationary MonkeyCam by unshying the comp and deactivating the Position and Orientation expressions in the MonkeyCam Target layer.
The reason this might be helpful is that you may want to manually move the camera or keep it stationary while still retaining the Camera and Visibility Effects Controls in the Effects box.
This might apply when trying to achieve a perfectly smooth circle rotation via keyframing the Circle Effects Controls, rather than relying on the automatic MonkeyCam motions.
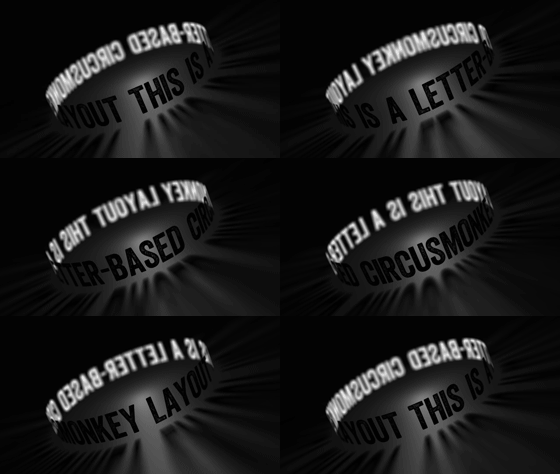
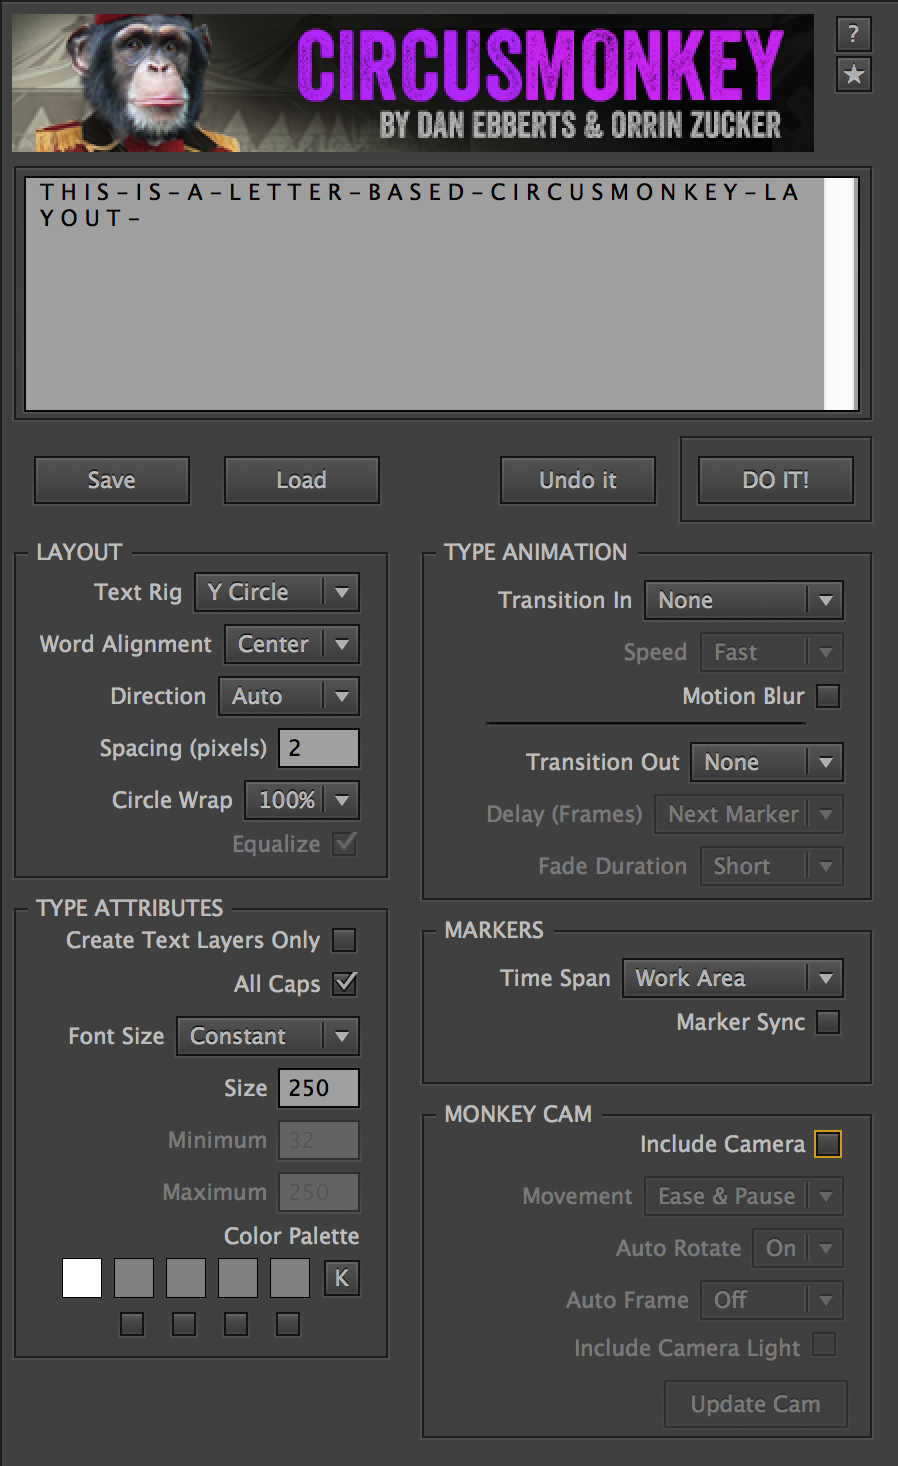
To do this you’ll need to put a space in between each letter in the Text Box and use an arbitrary letter (or several letters depending on how much space you want between words) as a space placeholder, which will be turned off after the build.
Note: Do not use the X Stretch Shape Controls after the build because it throws the Circle Control Y Rotation off axis. If you have special characters, such as an apostrophe, you might have to manually adjust the line height. To do this, as well as turn off the letter-space placeholder, use Reveal Text/Image in MonkeyTools.
Once this is done, manually rotate the circle by following the Manual MonkeyCam directions above and disable the automatic movement of the MonkeyCam.
Equalize will scale the Control Layer of each word to be the same width or length as the largest word in the comp, in order to eliminate left/right camera wobble. Because of this, it will appear that Auto Frame will have no effect.
Since Kuler no longer allows you to downoad .ase files, theres a way you can create your own (there might be others- please send them along if you know of any)
1) In Illustrator, open up the Swatches window: (Windows/ Swatches)
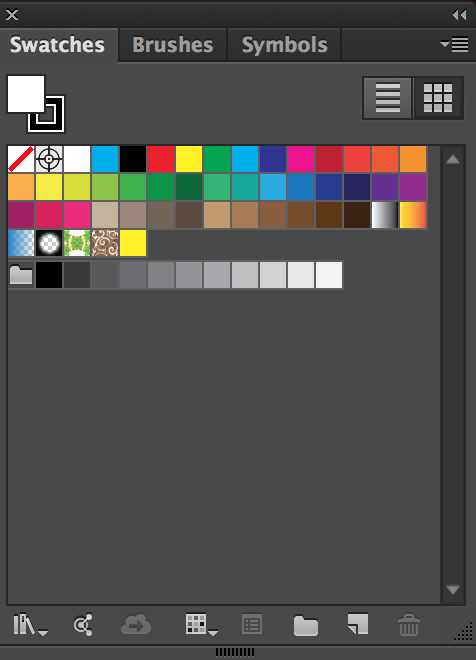
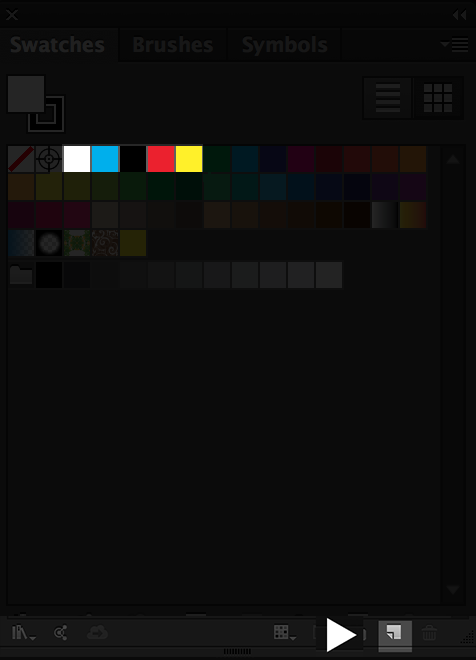
2) If there is a library loaded, you can select each of the first 5 colors and click on the new color icon at the bottom of the window to edit the colors to the ones you want to save to as an .ase. (The first 2 color boxes are reserved for none and the registration mark and will be ignored by the .ase file). If theres no colors saved in the library you can just follow the same steps starting with the new color icon.
.ase files contain a maximum of 5 colors, but you can have less as well.
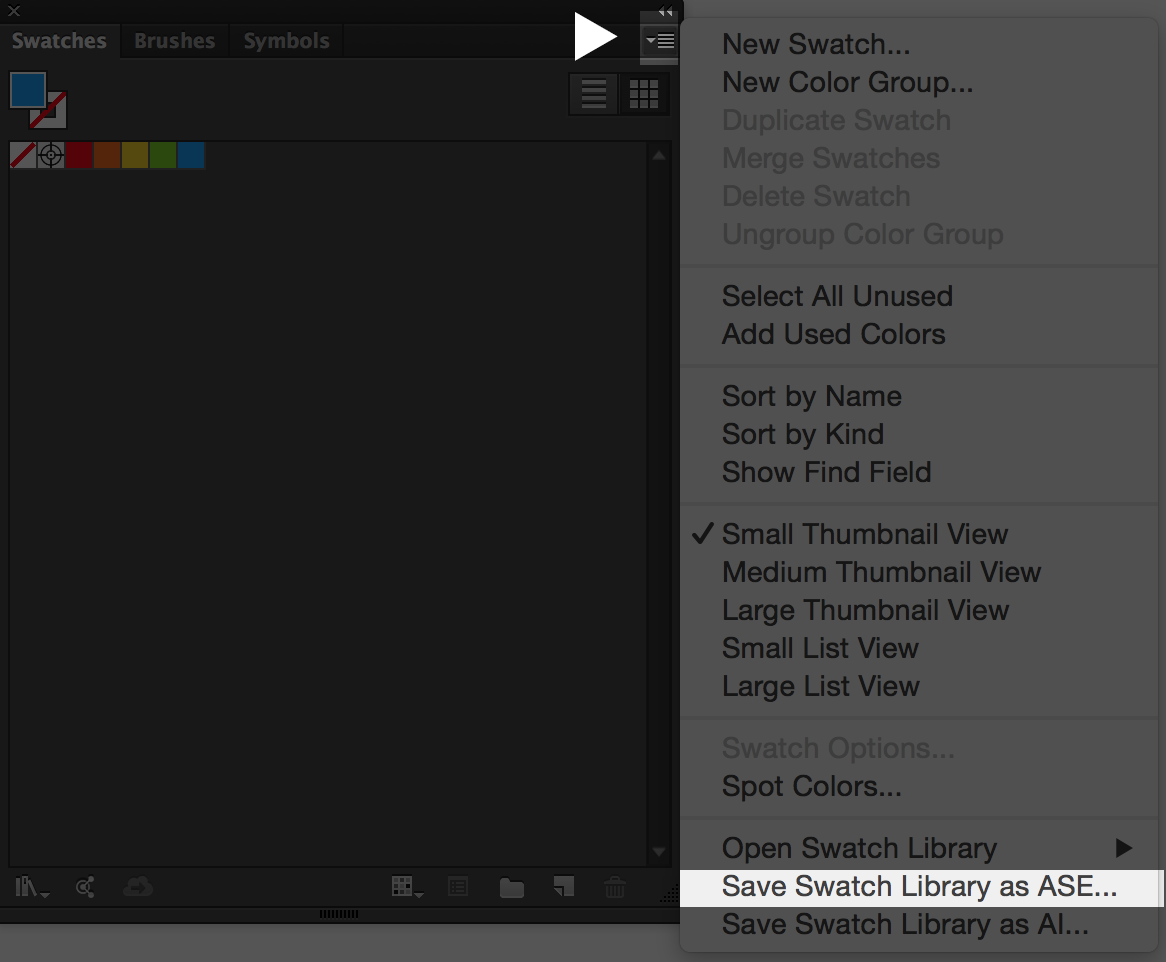
3) Click the button at the top right of the window revealing the list of commands. At the bottom of the list theres "Save Swatch Library as .ase". Click that and save where you can easily access it.
Also, heres a few links you can download .ase files - please send us additional links to post if you know of others:
2 Color Combos: http://www.designbolts.com/2015/12/19/10-best-2-color-combinations-for-logo-design-with-free-swatches/
3 Color Combos: http://www.designbolts.com/2015/12/24/10-best-3-color-combinations-for-logo-design-with-free-swatches/
http://www.designbolts.com/2015/12/29/8-awesome-color-combinations-for-your-2016-graphic-design-projects/
http://blog.graphicleftovers.com/8-trendy-color-palettes-with-free-adobe-swatch-exchange-files-ase/
http://veerle.duoh.com/inspiration/
The dropdowns in the UI are getting cut off: Click here for more info
