
Learn how to create a dynamic multi-part text box using Pins & Boxes by mamoworld.
Read More
Learn how to create a dynamic multi-part text box using Pins & Boxes by mamoworld.
Read More
The Beat Wiggle feature of BeatEdit for After Effects is a great tool to animate texts - in particular, if you combine it with our TextExploder to animate each letter individually. In this tutorial, you create a complex text animation the easy way and also learn about a super useful and flexible expression to add to your arsenal.
Read More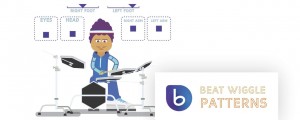
Learn how to automatically animate a complex, multi-step drummer in no time! This tutorial uses BeatEdit for Ae, along with Joysticks & Sliders and Limber.
Read More
You’ve built a dynamic layout with Pins & Boxes and wonder how to center it in your comp? Here is a super easy and general approach to center it around any pin or box of your layout! Use this in your Mogrt templates!
Read More
In this tutorial series learn how to create dynamic layouts in After Effects using Pins & Boxes. This is especially useful if you are creating Mogrt projects!
Read More
Learn how to apply expressions to 2D and 3D properties, such that you don’t have to separate dimensions anymore.
On the technical side, you learn what arrays are and we also talk a lot about variables - how you create and use them and why they make your expressions more modular and readable.
Read More
If you want to move After Effects layers with a mocha track, it is a VERY bad idea to apply the tracking data to a null object or directly to the position, scale and rotation of your layers: The result is very inaccurate, because the skew and perspective deformation of the track is ignored if you are doing that. A much more accurate way to move layers is using a corner pin effect, but with a normal corner pin, your layers are stretched into the corner pin surface which is often not what you want. The “keep current frame” option of MochaImport+ offers a 100% accurate solution that is as easy to use as a null layer. Learn how to do “keep current frame” corner pins in less than 4 minutes!
Read More
Stabilized precomps are one of the most powerful features of MochaImport+. In V6 you can send masks or 2d properties (the position of layers or effect control points) from the main comp to a stabilized precomp, or vice versa. In less than three minutes this tutorial shows you how to do this and why it is so useful for your compositing work in After Effects.
Read More
In this tutorial, you learn how you can move masks in After Effects with a track created with the mocha plugin that is bundled with After Effects CC 2019 (or also with any Mocha version). Since we use the “move point(s) or path(s)” function of MochaImport+ for that, the masks are not just moving with the track, but can also still be keyframed on top of the track to fix any inaccuracies. Learn this powerful rotoscoping workflow in just three minutes!
Read More
Learn how to use the Cartoon Bundle for Squash & Stretch Pro in this 4 part tutorial series. Squash & Stretch is a tool for After Effects that saves you time with a collection of ready to use behaviors, carefully handcrafted by professionals and controlled by an intelligent system – ensuring your animations come to life without starting from scratch each time. There is a free and a pro version. The Cartoon Bundle extends the pro version with additional behaviors and sound effects.
Read More
This tutorial is about automating your After Effects workflow with Google Docs. Learn how to export all texts of your After Effects project to a google spreadsheet using Text2Spreadsheet that you can share with your clients, collaborators or translators. Then, they can edit the texts in the google spreadsheet conveniently in their browser and once they are done editing, you import all changes back to After Effects in a single click. So, you offer a great service to your clients and in addition, you also save a lot of time!
Read More
In this class we use everything we learned in the previous classes for a hands-on example: We develop an expression to rotate the wheels of a car automatically. It works such that you only need to keyframe the position of the car and the expression calculates how the wheels need to rotate to fit to that movement. We start with the quick and easy solution using iExpressions and then develop our own version by writing our own expressions code.
Read More
Limber is the latest tool for Inverse Kinematics and Character Animation in After Effects using Shape Layers. In this tutorial, we show how to apply the automatic walk cycle of iExpressions 2 to a zombie character rigged with Limber such that the zombie walks fully automatically when we keyframe its position.
Read More
The toComp and fromComp functions of After Effects expressions can be confusing - but they don’t have to be! Watch this 1-minute tutorial to understand how they really work and how to use them. An an example, we link the center of a circle effect on one layer to the center of a circle on a second layer such that they always stay in place no matter how you move, scale or parent any of the two layers.
Read More
This class gives you a systematic overview of the basics of the expressions language in After Effects. You learn how to do basic math and how to use variables to access almost everything in your project. This allows you, for example, to place layers relative to other layer or let them adjust to the size of the composition automatically. We also show how to scale and offset a motion path with expressions.
Read More
In the new After Effects CC 2018.1 you can now import json and jsx files to use directly in expressions. So instead of copying and pasting your expressions code again and again, you can keep your functions in one, central location now and access them easily from any expression. Work more efficiently and build your own expressions library file that you can reuse in any project!
Read More
The second class of the Tutorials Series about Adobe After Effects Expressions featuring the wiggle expression and some explosions!
Read More
If you are using Premiere Pro and want to start learning how to create titles or lower thirds for your projects in After Effects, then this is exactly the right tutorial series for you. In this part two we create a lower third using text and shape layers. You learn how to work with shapes in Ae, how to use matte layers to clip animated texts and how to animate in After Effects using the extension Squash & Stretch. In just a few minutes we create the entire lower third from start to finish - even including sound effects! And you also get some useful design and layout tips on the way.
Read More

If you are using Premiere Pro and want to start learning how to create titles or lower thirds for your projects in After Effects, then this is exactly the right tutorial series for you. In this part 1 we create a text overlay with a subtle and elegant animation. You learn how to bring a clip from Premiere Pro to After Effects using Dynamic Link, how to create texts in After Effects and animate them easily with the extension Squash and Stretch. You also learn how to add effects and use keyframes to animate the text overlay.
Read More