Charles Yeager shows how to create an 8K environment map—entirely in After Effects—using the SkyBox plugin. You can download the project file and 3 free 8K Environment Maps created using this method.
Read More
In this tutorial for envatotuts+, Charles Yeager shows how to create a 360° Video in After Effects using the plugin SkyBox Studio by Mettle. Everyone can follow along with this tutorial by downloading a free trial of SkyBox Studio plugin.
Read More
Learn how to stabilize 360 Drone footage and add VFX, all in After Effects with SkyBox Studio. He begins by stabilizing the 360 footage using SkyBox Studio module "SkyBox Convertor", with the "Re-orient Camera" feature. Alex also composites an explosion with smoke on the horizon, a flash of light, and radioactive particles. He uses "Re-orient Camera" to also add a camera shake during the explosion.
Read More
This is a tutorial on Trapcode MIR 2 - a very powerful plugin and I wanted to create something hi-poly with some realism to it. There are some key elements to follow here that I initially struggled with - but I'm going to teach you some important aspects of the plugin here with simple language.
Read More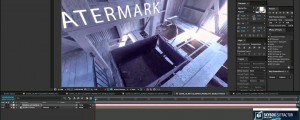
In this short tutorial, learn how to add a watermark, object removal, compositing, color correction, lens flare and glow, add an Element 3D sphere and more to a 360º video using SkyBox Studio. All that in 24 minutes!
Read More
An in-depth 8 part series to create a highly automated rig to animate 2D characters for cartoons in After Effects. The rig is based on iExpressions 2 and the puppet tool. It features an automated walk cycle, automatically rotating wheels, secondary animations and much more.
In bonus part 8 you learn how to create a parallax effect for the 2D scrolling background.
Depending on the distance, the different parts of the background move with a different speed. With the iExpressions rig shown in this part, you only need to move one background layer manually and all other elements follow automatically with a speed that depends on their distance.
An in-depth 8 part series to create a highly automated rig to animate 2D characters for cartoons in After Effects. The rig is based on iExpressions 2 and the puppet tool. It features an automated walk cycle, automatically rotating wheels, secondary animations and much more.
In part 7 add more realism to our character with secondary animations. We addd a little bit of random motion since in real life people never stand 100% still. Also, we animate her chest to simulate some breathing and make her hair swing a bit when she is walking.
Read More
An in-depth 8 part series to create a highly automated rig to animate 2D characters for cartoons in After Effects. The rig is based on iExpressions 2 and the puppet tool. It features an automated walk cycle, automatically rotating wheels, secondary animations and much more.
In part 6 we extend the rig for our baby buggy such that the buggy wiggles automatically when it is moving.
Read More
An in-depth 8 part series to create a highly automated rig to animate 2D characters for cartoons in After Effects. The rig is based on iExpressions 2 and the puppet tool. It features an automated walk cycle, automatically rotating wheels, secondary animations and much more.
In part 5 we create the rotating wheels of the baby buggy. They rotate automatically when you move the character. And even the highlights on the spokes fade in and out naturally when the wheels are rotating.
Read MoreIn this quick tutorial learn how to recreate a famous Giacomo Carmagnola image using AE Pixel Sorter in After Effects
Read More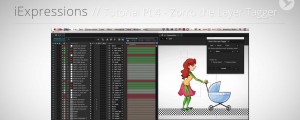
An in-depth 8 part series to create a highly automated rig to animate 2D characters for cartoons in After Effects. The rig is based on iExpressions 2 and the puppet tool. It features an automated walk cycle, automatically rotating wheels, secondary animations and much more.
In part 4 you learn all about Zorro, the layer tagger. This tool is very helpful, whenever you have an After Effects project with lots of layers.
Read More
An in-depth 8 part series to create a highly automated rig to animate 2D characters for cartoons in After Effects. The rig is based on iExpressions 2 and the puppet tool. It features an automated walk cycle, automatically rotating wheels, secondary animations and much more.
In part 3, we create an automated walk cycle with iExpressions. You just need to keyframe the position of the character and the iExpressions-based rig animates the legs and the body automatically such that the character is walking.
Read More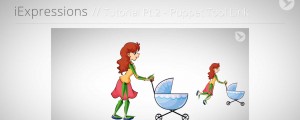
An in-depth 8 part series to create a highly automated rig to animate 2D characters for cartoons in After Effects. The rig is based on iExpressions 2 and the puppet tool. It features an automated walk cycle, automatically rotating wheels, secondary animations and much more.
In part 2, we connect the skeleton to our character using the puppet tool. You learn the basics, but also some advanced tips for this workflow. For example, you learn how to achieve that puppet pins on the skirt of the character are influenced by the bones of both legs simultaneously.
Read More
An in-depth 8 part series to create a highly automated rig to animate 2D characters for cartoons in After Effects. The rig is based on iExpressions 2 and the puppet tool. It features an automated walk cycle, automatically rotating wheels, secondary animations and much more.
In part 1, create a skeleton for our character with the inverse kinematics iExpressions. The skeleton is the basis for all subsequent animation.
Read More
In this last installment of the Plexus tutorial series by super talented designer and Plexus expert Simon Bronson create a twisty abstract DNA strand just using Plexus! Also check out Part 1 and Part 2 in this series as well as our in-depth interview with Simon as well as his most excellent demo reel.
Read More
This is the second tutorial in the Plexus tutorial series by super talented designer and Plexus expert Simon Bronson. Here he explains the process of using lights created in C4D to create beautiful particle trails in After Effects using Plexus.
Read More